
Happy Monday y’all! Who’s ready to have a successful week? I think I’m confident enough to say I at the least I am ready to conquer almost anything. Anyways, today I’ve got my second “Sea Creature Boards.” So, let’s get started with my “Hand-Drawn Cricut-Made Stencil Whale Board…”
Things Used:
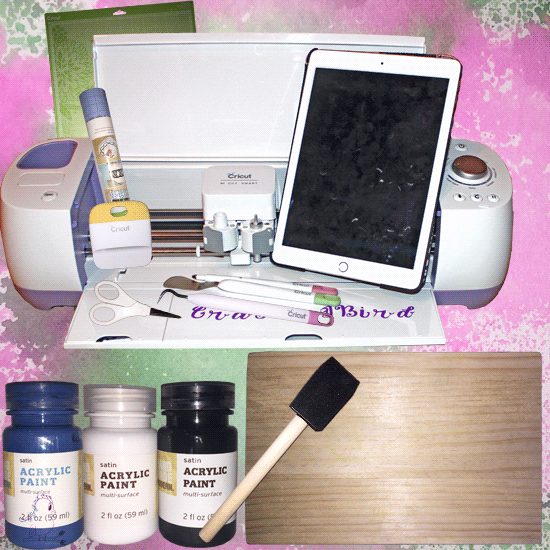
- Crafty JBird’s Whale Drawing
- Cricut Explore and Tools
- Photoshop Elements 13
- Sponge Wood Handle Paint Brush Set
- Hand Made Modern Acrylic Paints
- ArtMinds™ Boards 8 by 12
To purchase most of the products used in this post click on the product you want for the link to Amazon.com. For the Cricut Explore, Tools, and Accessories, click on the ad below. I purchased the Boards by ArtMinds™ from Michael’s Craft Store.
If you have been following all my posts, you might remember my “Whale Bag” I made for my mom. This project is similar only it’s on a piece of board I can hang on a wall, and I have a few more to go with this project. –So stay tuned–

Step #1:
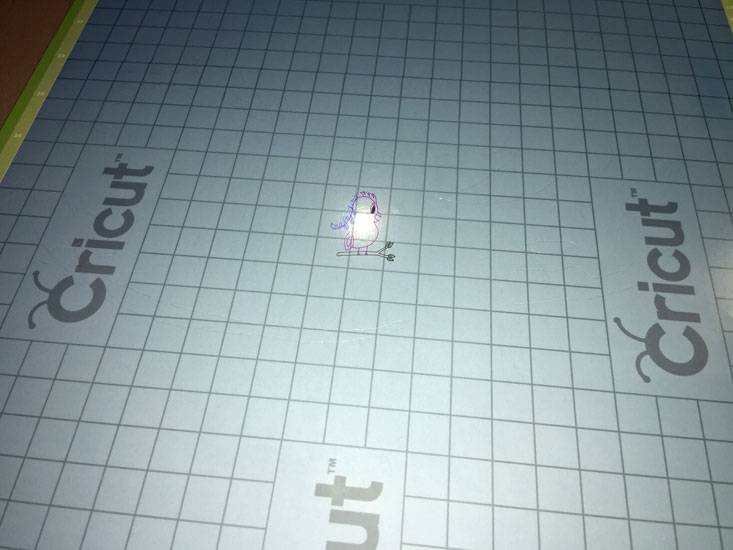
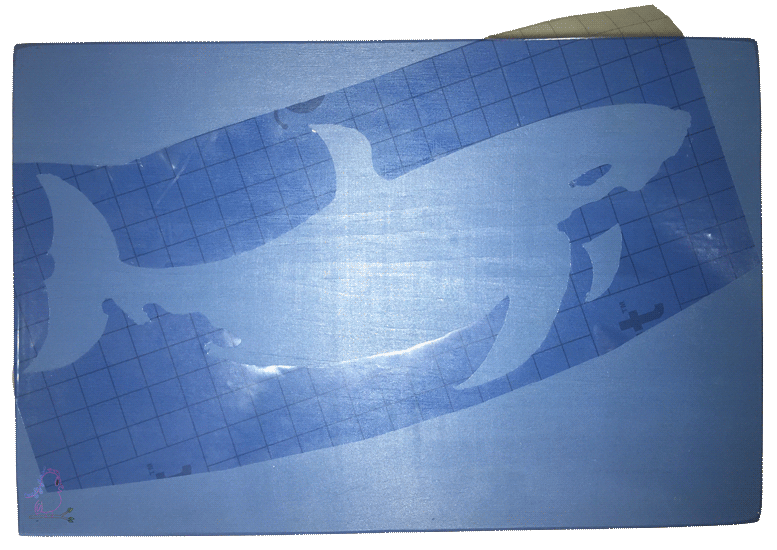
First thing I did to start my “Hand-Drawn Cricut-Made Stencil Whale Board” project, was open a new project in Cricut Design Space and cut my hand-drawn whale out on Cricut’s Stencil Vinyl.
Step #2:
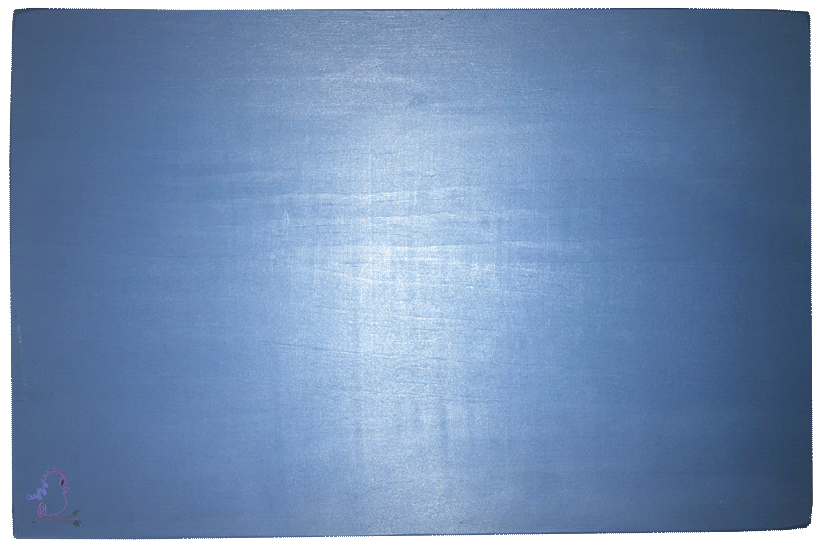
While my Cricut Explore was cutting my whale out, I went ahead and started on my board and painted my first coat of paint on the front and sides. Here I used the “satin Dark Lapis” color paint.

Step #3:
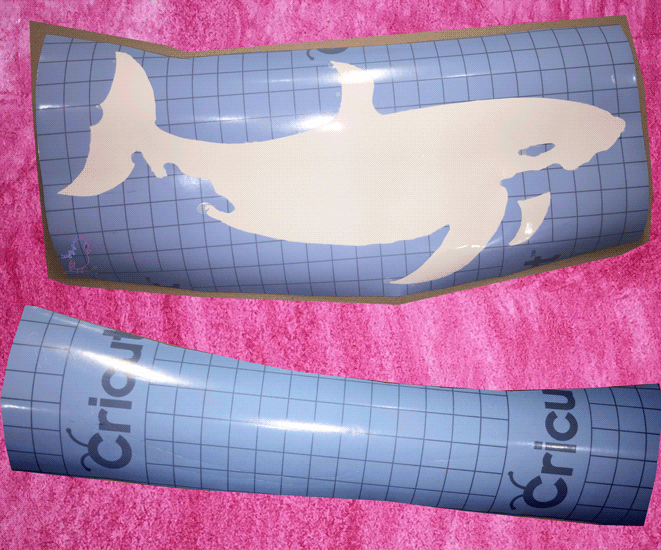
Once my whale was finish getting cut out, I carefully removed the middle pieces front the bottom layer stencil, but it wasn’t until later that I did the same for the top layer stencil.
Step #4:
After a couple more coats of paint letting each coat dry for at least an hour as instructed, I was ready to carefully place the bottom layer of my whale stencil in the spot I wanted it to go.
Step #5:
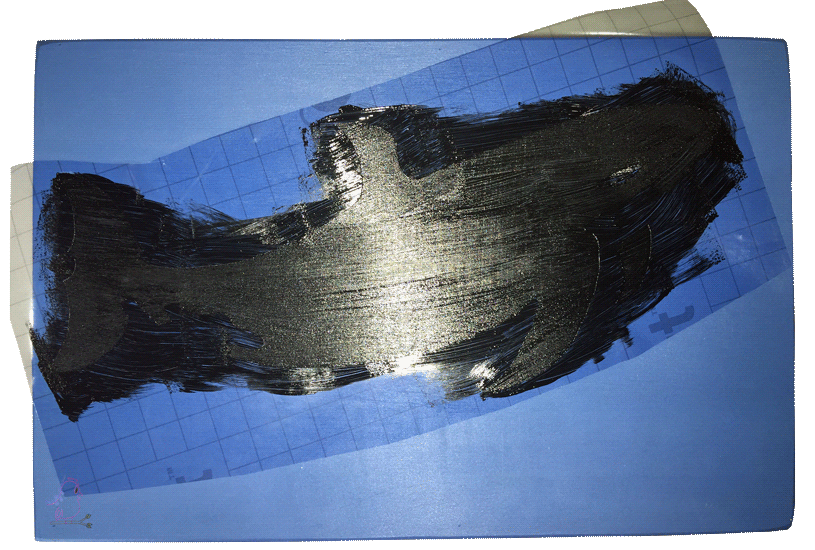

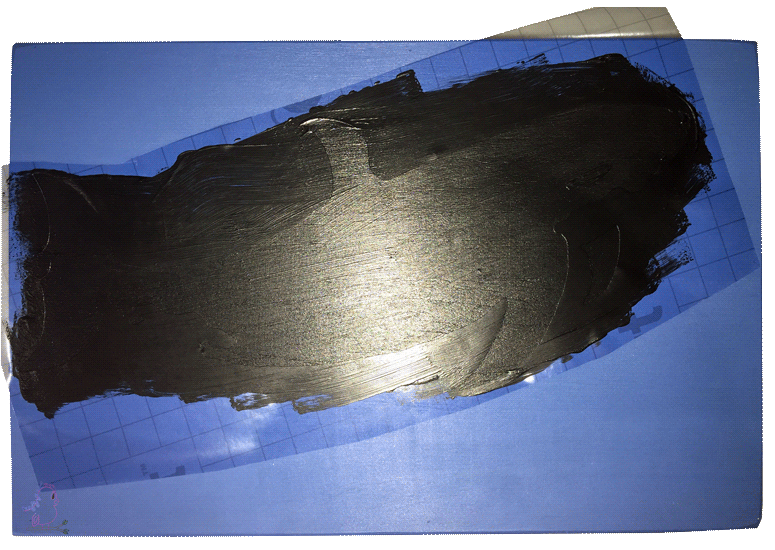
With my whale stencil in place, I carefully started painting the middle of the stencil using the “satin Coal” paint. Again, I added three coats allowing each coat to dry at least an hour each time.

Step #6:
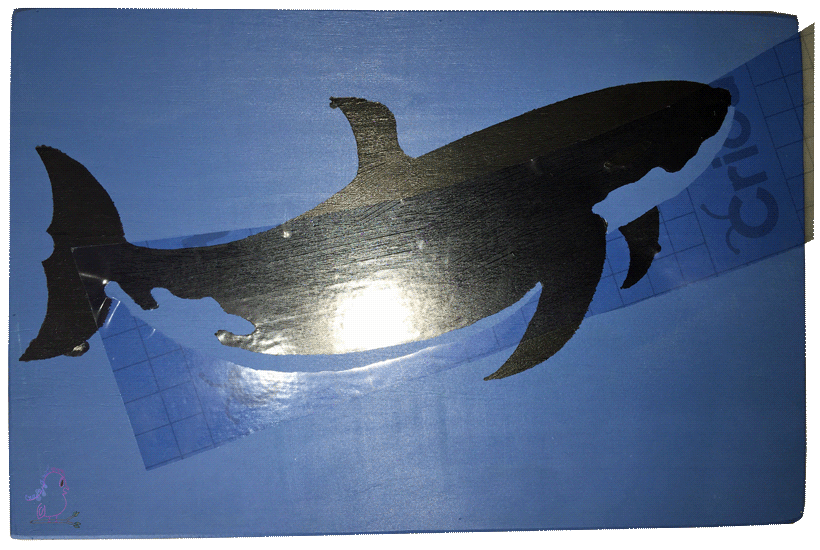
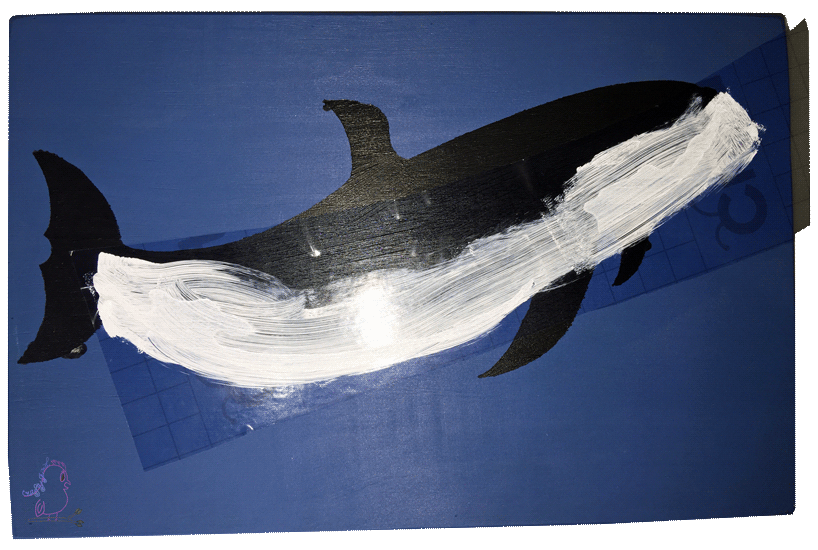
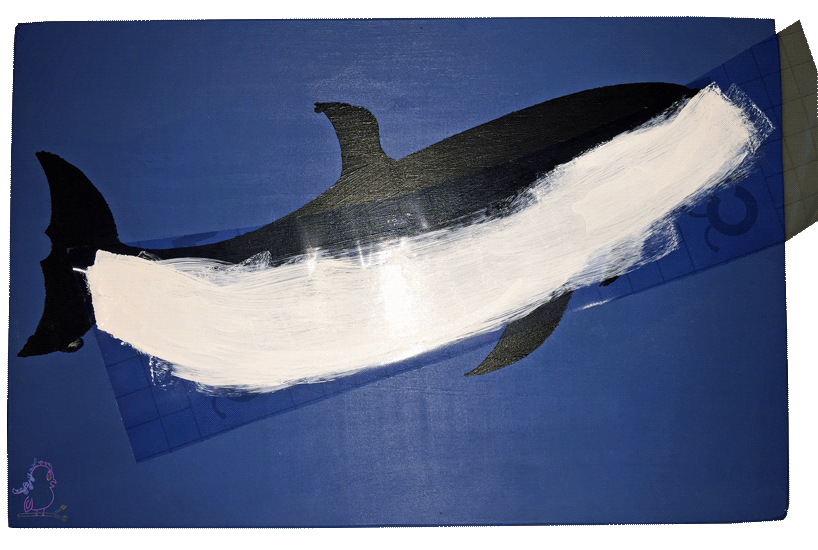
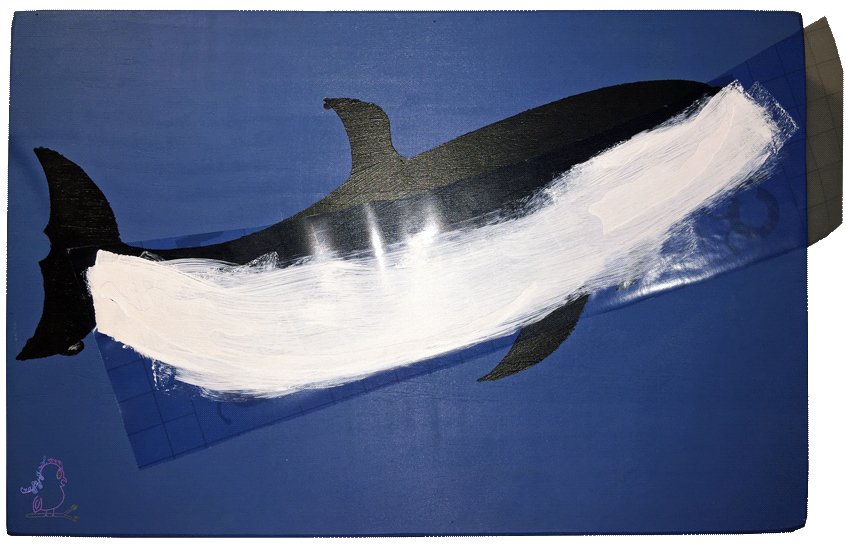
Once the bottom layer of my whale was finished drying thoroughly, I carefully placed my top layer stencil to matchup with the bottom layer as well as possible. Then using the “satin White” color paint, I carefully painted the inside of the stencil. Again, for this layer, I used three coats, letting each dry accordingly.
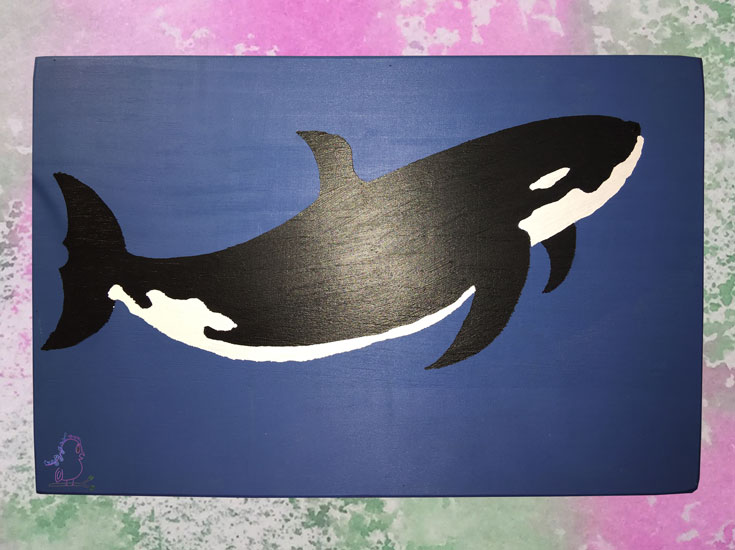
There you go! A cute and easy “Hand-Drawn Cricut-Made Stencil Whale Board” painted on a board I can use to decorate my apartment. Hope you enjoyed! Be sure to check back for the rest of my “Sea Creature Boards.”
Need an excellent getaway place to go to make all your creative ideas? Visit Memory Lane Inn!
Have any questions about today’s “Make It Monday” “Hand-Drawn Cricut-Made Stencil Whale Board” post? Please feel free to comment below. Thanks for visiting! Hope to see you again!
JBird
**The advertisement found in this post as with all other posts, as affiliated links. Affiliated links mean by clicking them and making a purchase I get a commission. I used these affiliated links to help me keep my blog going as project materials still cost money.**