
Hellloooo Make It Monday!!
Let the Countdown Begin! Hope everyone had a great Thanksgiving Break and fun time shopping on Black Friday! We did a little shopping but nothing for ourselves; but that’s a story for Random Tuesday. 🙂 Anyways, today I’m going to share a project I’ve been working on all weekend. I called it “Crafty JBird Christmas Countdown.” Any guesses on what the theme is? Let’s get started…
Crafty JBird Christmas Countdown
If you guessed the theme to be ‘beachy,’ you were right! 🙂 I love the beach, what can I say and really, what did you except?
** If you are on your Mobile device, I have more than just 3 pictures in this post but for some reason they are not showing up at this time. I am working on trying to get it to work. In the meantime, if you can, please visit on a computer to see all the pictures. Thank you!**
Things Used:
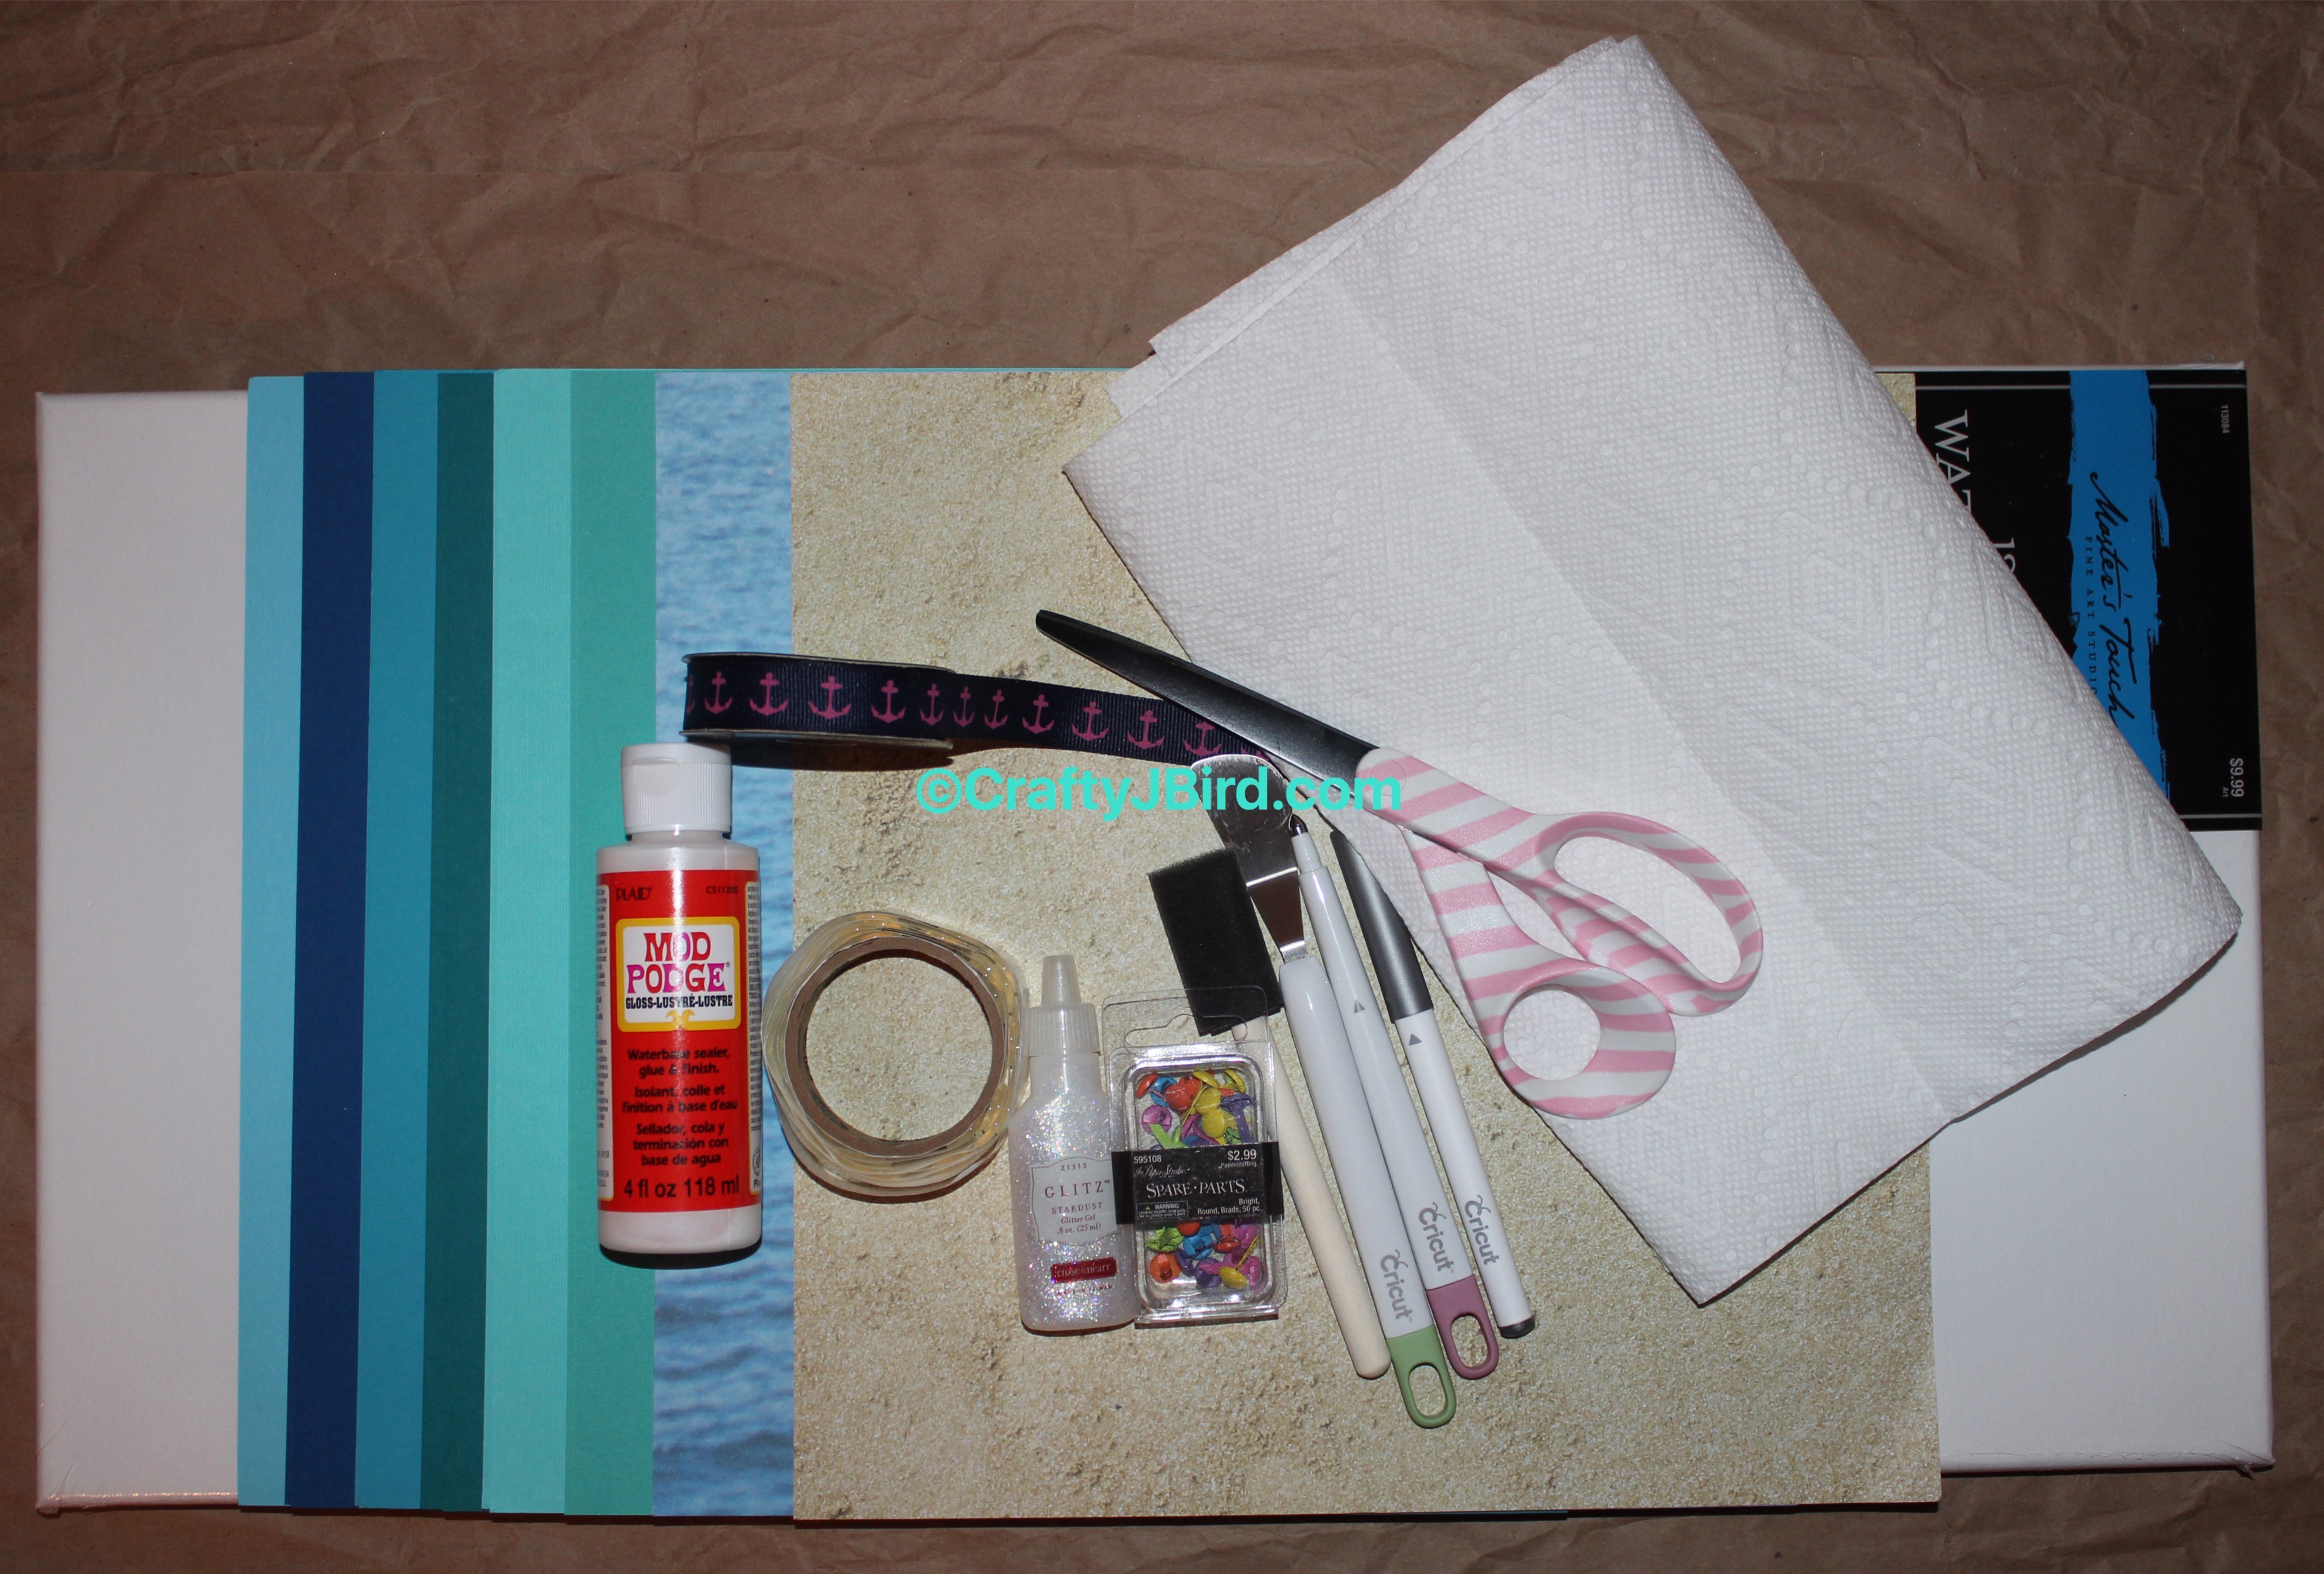
- 12 by 24 Canvas
- Cardstock
- Patterned Paper
- Cricut Explore
- Design Space
- Cricut Mat
- Tools for Cricut
- Close To My Heart Glitter Gliz
- Pop-up Glue Dots
- Brads
- Close To My Heart ‘Poker’
- Mod Podge
- Foam Brush
- Xyron ‘X’
I purchased the Canvas, Brads, Cardstock, and Patterned Paper from Hobby Lobby. The Pop-up Glue Dots, Mod Podge, Foam Brushes, and Xyron ‘X’ are just things I’ve had on hand, so who knows where they were purchased.
Step #1:
[soliloquy id="3038"]
First thing I did, using my foam brushes, was put Mod Podge and the Patterned Paper on my Canvas. I added one coat to the Canvas itself, placing the water paper on first and then the sand paper. After both patterned sheets were in place, I added one coat on top, let it dry, then added another coat of the Mod Podge and let it dry while I got to work on the rest of the project.

Step #2:
[soliloquy id="3039"]
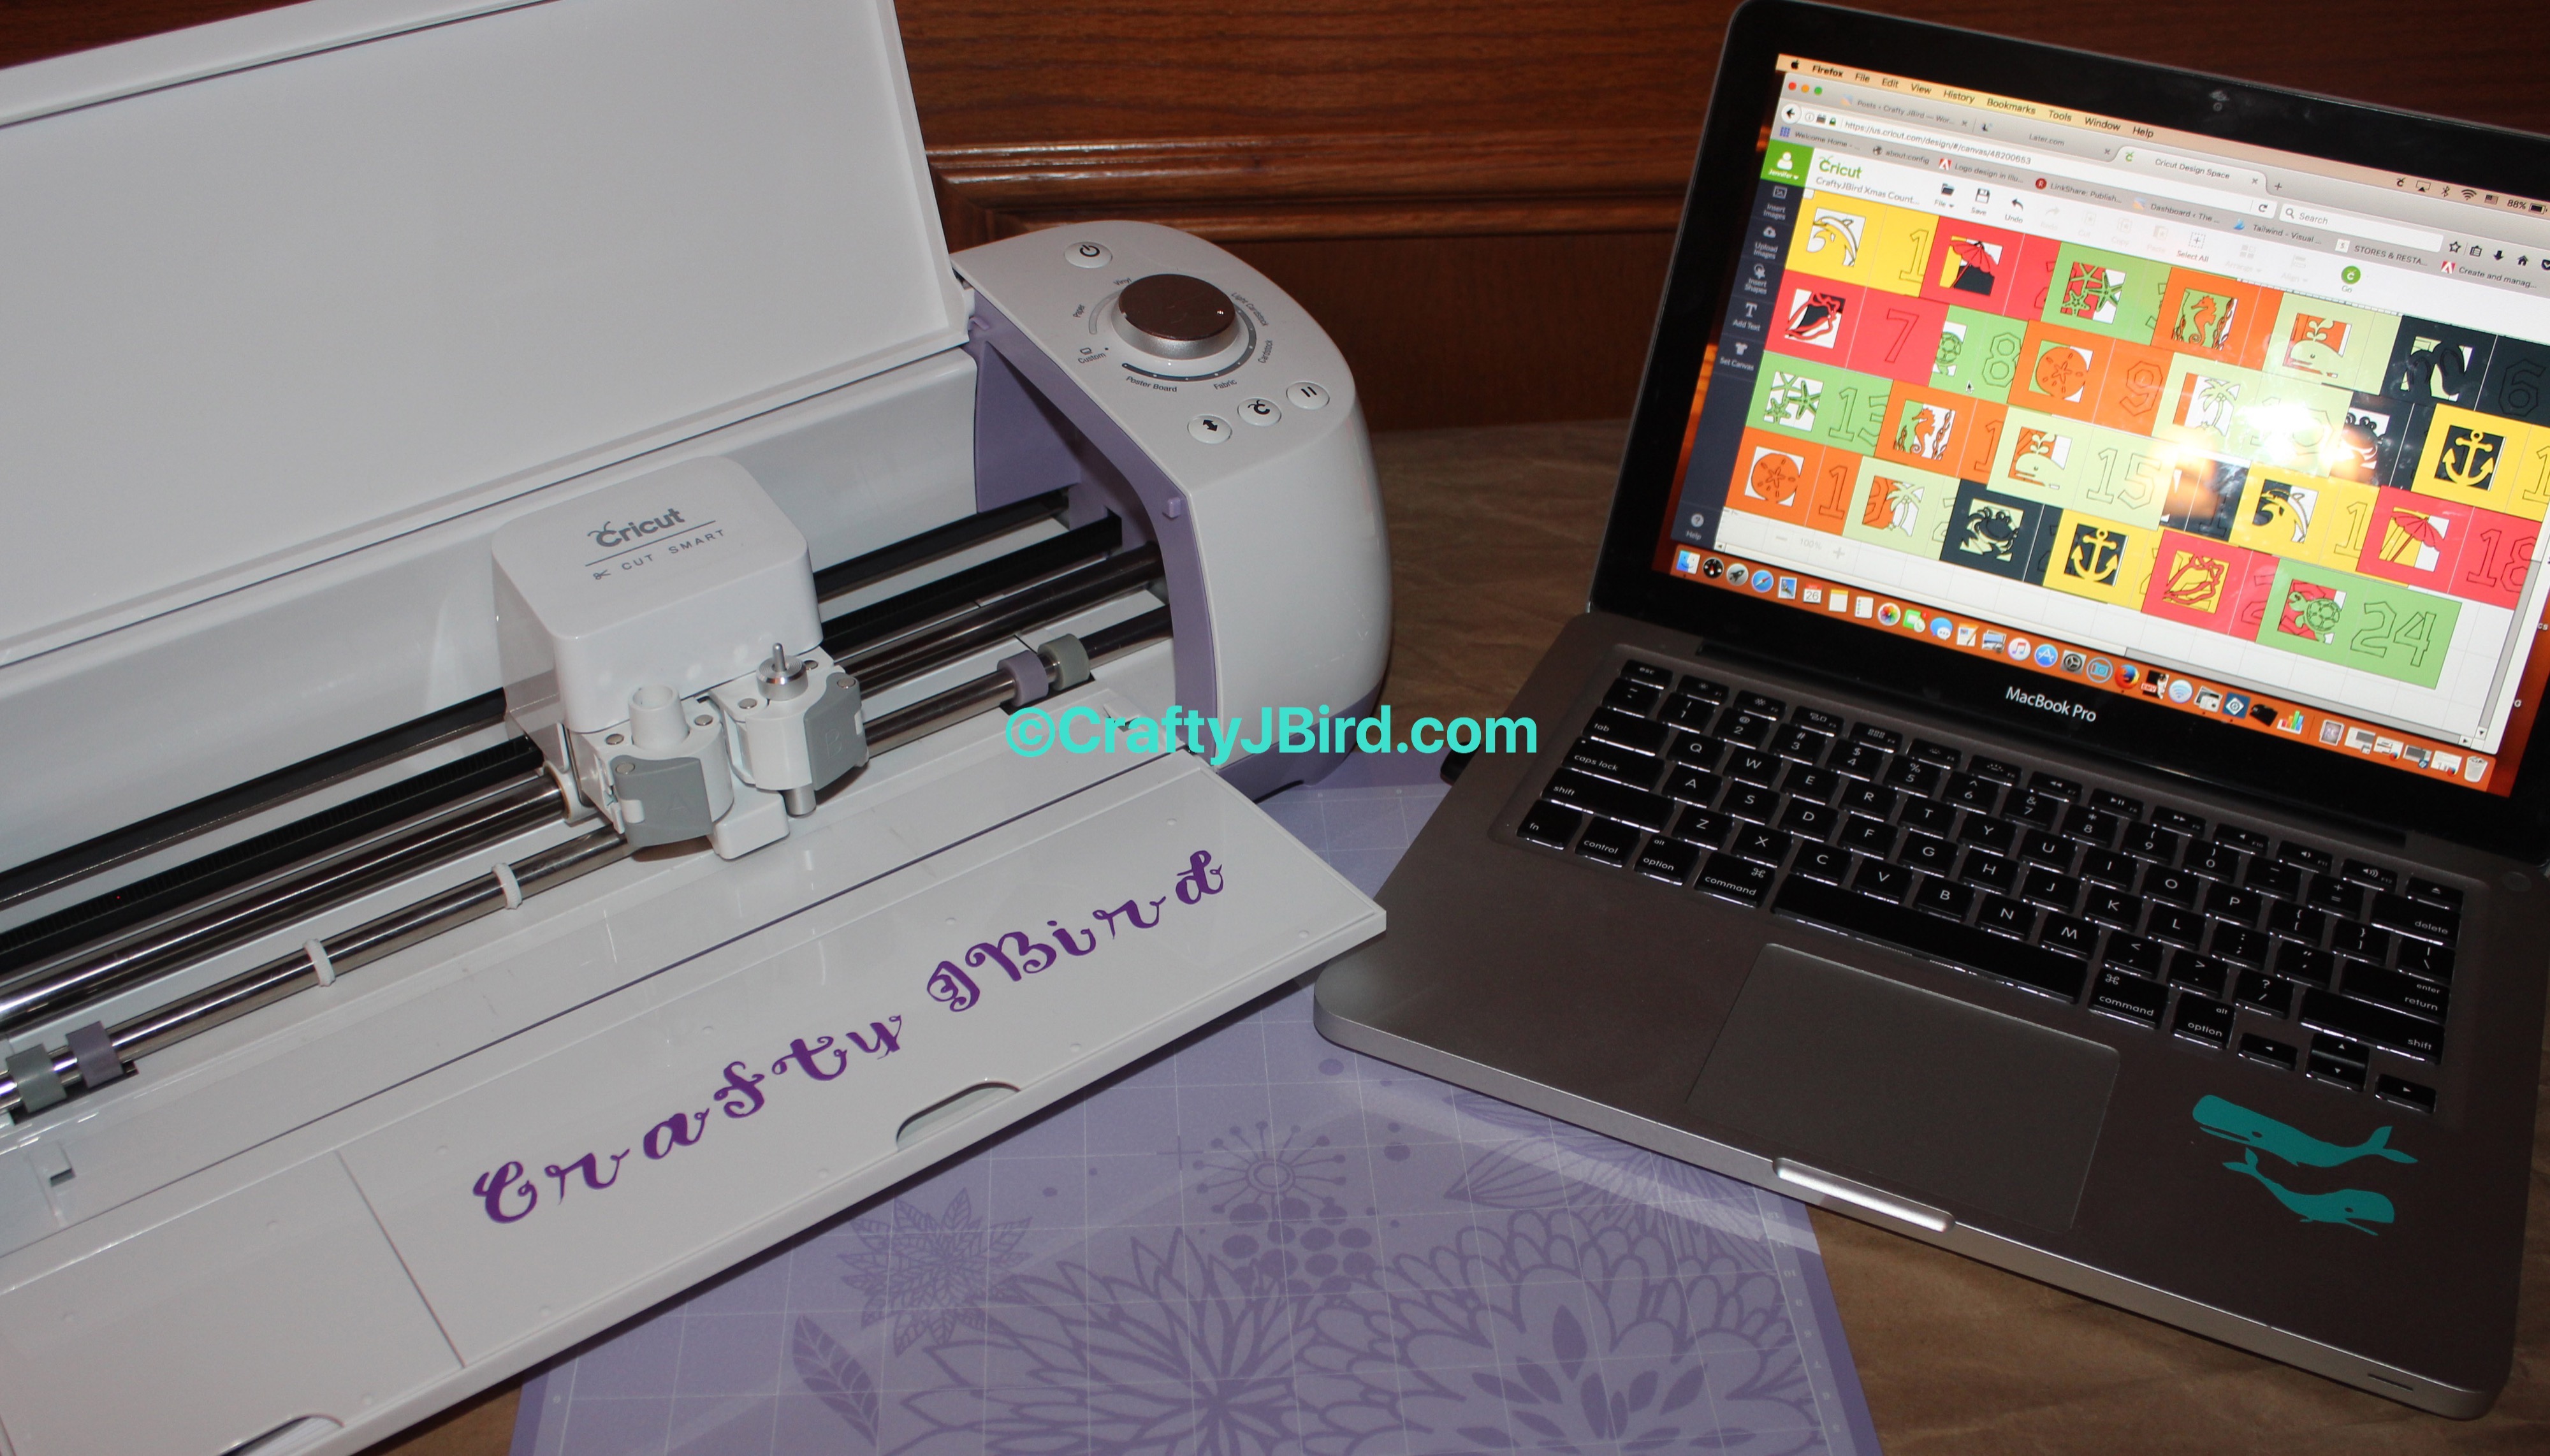
While the Canvas dried, I put my Cricut Explore to work. Since I wanted to make a ‘beachy’ countdown, I used my all time favorite cartridge — “Life is a Beach.” I used the small cards off the cartridge so I could fold them one way or the other. There are so many to choose from, but I only used twelve different ones and then had the Cricut Explore cut those twelve out two times. Only because I wasn’t quite sure how everything would come out by the end.
[soliloquy id="3042"]
In order for them to cut out the way I wanted, I first ‘mirrored’ each card. Then I added a text boxes on each card, numbering up to 24.
Step #3:
[soliloquy id="3040"]
Next, after the cards finished cutting, I cut the words “Crafty JBird Christmas Countdown” out with the Cricut Explore. Again, I used the cartridge “Life is a Beach.” I had it cut out twice where one set was slightly bigger than the other so I could use it as a shadow. The only downfall of this cartridge is it doesn’t have the shadow option; but nonetheless I still use it all the time literally.
After having the words cut out, I ran the one that would be on top of the slightly bigger ones through the Xyron ‘X’ and placed them on top of the bigger ones. Once finished with that, I used my ‘poker’ from Close To My Heart and put a brad on each card to close them. This was for the purpose to show how they looked on the front with the numbers and on the inside with the cutouts. Be creative of how you want to have them look for people to see the inside and out.
 Purchase any Vera Bradley Stocking Stuffer and receive a second Stocking Stuffer item for 50% off, while supplies last.
Step #4:
[soliloquy id="3041"]
For the top under where I planned on putting the words, I decided to cut out a star and add a dolphin. The star came from the cartridge “Graphically Speaking.” I just typed star in the search box, filtered for “My Images” and it was on the third row down. For the dolphin, however, I hand drew this dolphin. I’ve used it a few other times in various posts. I was super excited to get it imported into Cricut Design Space and have the Cricut Explore cut it out. To help my star stand out a bit more on the water patterned paper, I outlined it in Close To My Heart’s Glitter Gliz. I also added a dot to my dolphin’s eye.
 Step #5:
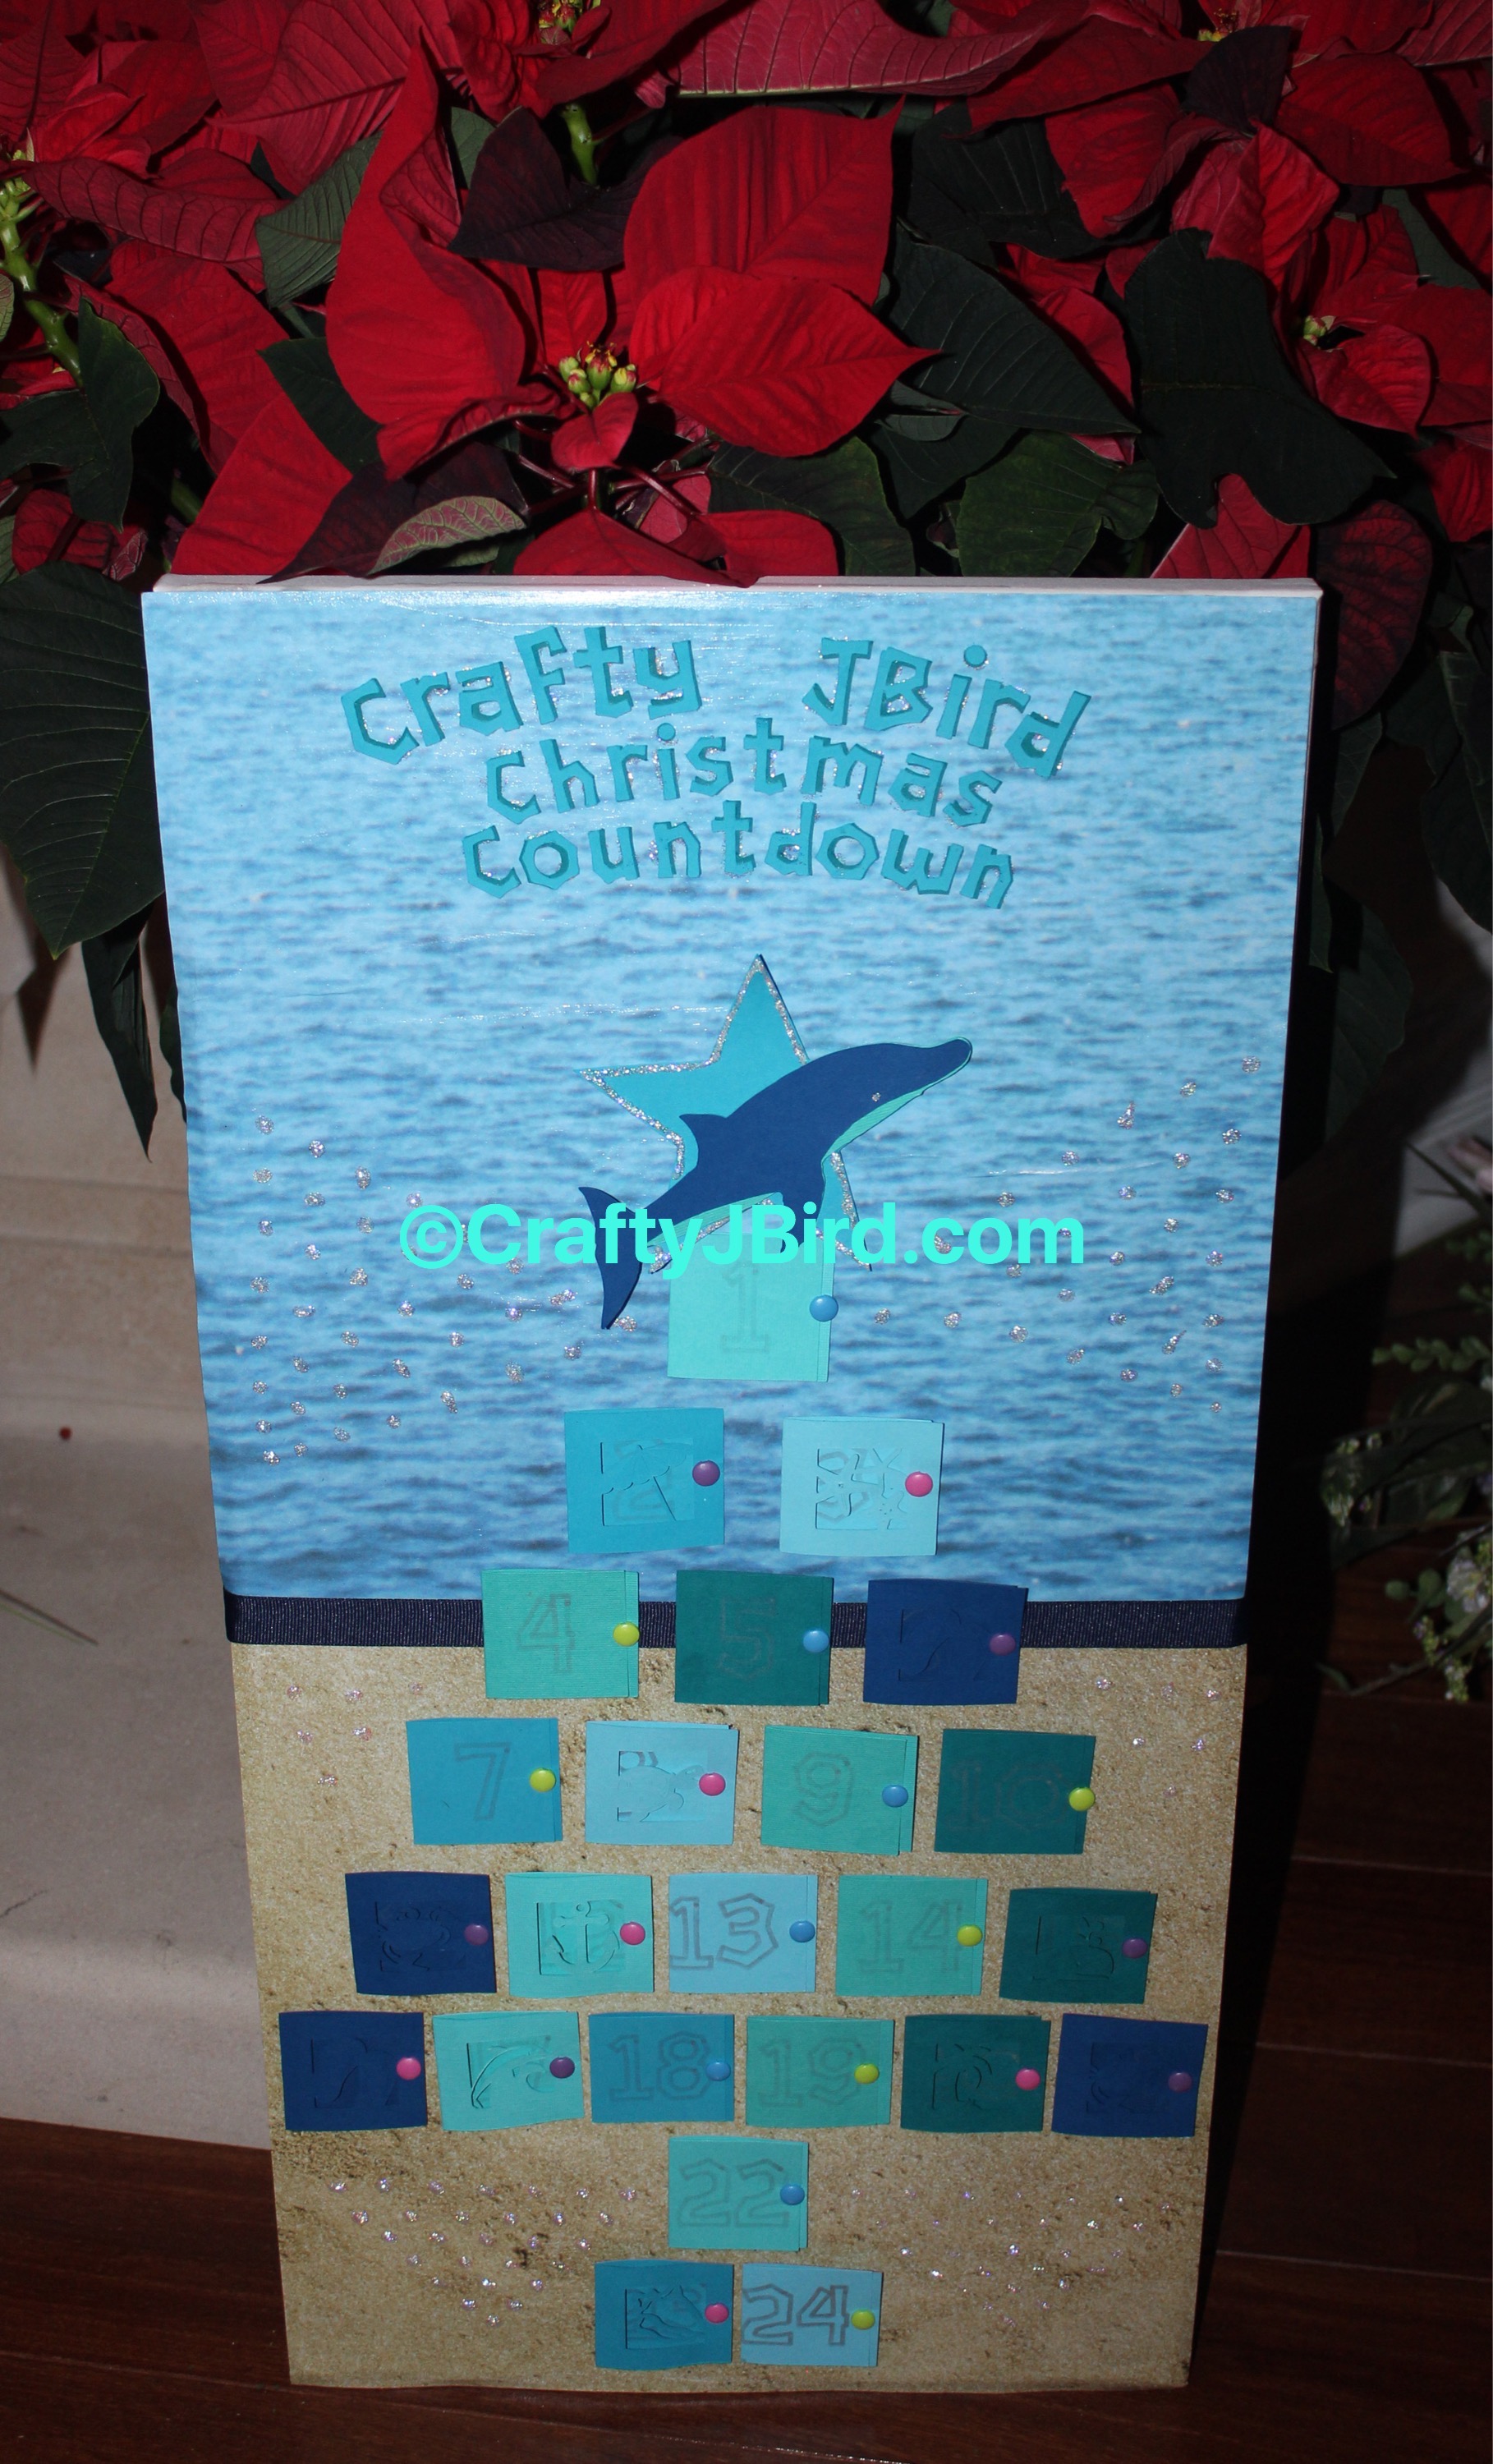 Finally, I put everything together. Using my pop-up glue dots, I adhered each card in its place to create a Christmas Tree. Using my Glitter Gliz, I adhered my words to the top. Then carefully, added some glue dots on the back of my star (since it was still wet) and adhered it in place at the top of my ‘tree.’ Though can’t seem to see them very well, I also added some dots with my Glitter Gliz throughout my Canvas board. Want the file for the dolphin used in this project? Subscribe to Crafty JBird to receive e-mails, Follow me on Instagram, and ‘Like’ me on Facebook. Once you’ve done those three things, comment on my Facebook page with “send me the dolphin!” and I’ll send it.
Have any questions about today’s “Make It Monday” project? Please feel free to comment below and I’ll respond back as soon as possible! Thanks for visiting! Hope to see you again!
Crafty JBird