
It’s Tuesday! Hope everyone has a great day! Anyways, do you have a computer running slow, getting frustrated with it you just want to throw it in the pool/out the window?! Well, great news — there is a fairly easy fix, so you don’t have to go out and spend hundreds possibly thousands of dollars on a new computer. So, let’s get started with “Making MacBook Pro Like New Again…”
Over the Years:
For as long as I can remember I have been using external hard drives to back my computers up just in case the unthinkable happens. I mean living in a hurricane zone and having thousands of pictures don’t particularly mix very well. During my first year of college, my sister purchased her first Apple computer so of course me being the electronics chick of the family, I had to follow and get one myself.
Since then I have gone from having a 13″ white Apple laptop to a 17″ Apple to a 15″ and back to a 13″ Apple MacBook Pro; along with two different Apple desktops. Over the years I was the one who had rather spend my money on the newest models. Luckily for my bank account, I have sorta grown out of wanting the new and prefer to save for something I don’t have or really need the money to go towards such as bills.
External Hard Drives:
So, up until 2010, I had small external hard drives that didn’t particularly hold that much but just enough to back my computers up once or twice. After moving back to a hurricane zone, I purchased a 2TB Western Digital My Book external hard drive and tried to back my MacBook Pro up at least once every two months if not sooner.
For Christmas 2017, my brother-in-law showed me a new external hard drive of which I decided to purchase a 2TB one for my mom (and still need to set it up). After receiving Adobe Photoshop and Lightroom with a book from my sister, I went and purchased myself the same external hard drive but in a 4TB. This external hard drive is the My Cloud Home where it is password protected connected to the Wi-Fi so I can upload and access everything from anywhere without having to use the space on my laptop. I’ll talk more about this one in a few weeks so stay tuned!
Steps for “Making MacBook Pro Like New Again:”
Okay, so to be clear these steps have worked on all the Apple computers I have had over the years so one would assume it would still work just the same for the newer models. My current model is a MacBook Pro 13-inch, Mid 2012. I purchased it from Best Buy as an open box item. I refuse to purchase a newer model now that they have taken away the Super Drives even though I really want one with the touch bar. Guess we can’t have everything right?! Anyways…
Step #1:
To start, if you are planning on wiping out your computer to get ready and sell most suggest to sign out of everything – iCloud, Messages, etc. Since this post is for just “Making MacBook Pro Like New Again,” I’m not showing all those steps of signing out of each little things.
So, the first thing you will want to do is back up your computer to an external hard drive. As I mentioned above, I have mine backed up on my Western Digital My Book, but I also have some things doubled backed up such as pictures.
Step #2:
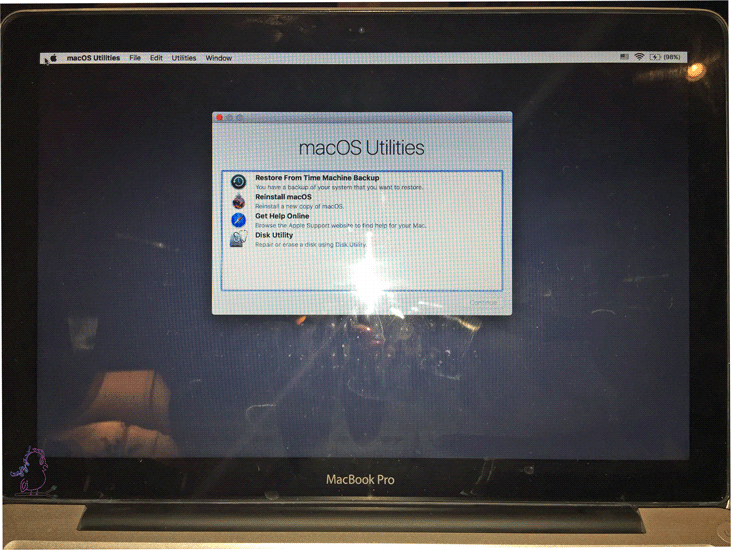
After everything is finished backup as you want, you will restart your computer and as soon as it starts restarting (black screen) press and hold down Command + R until you see a screen like the one you see here with macOS Utilities.

Step #3:
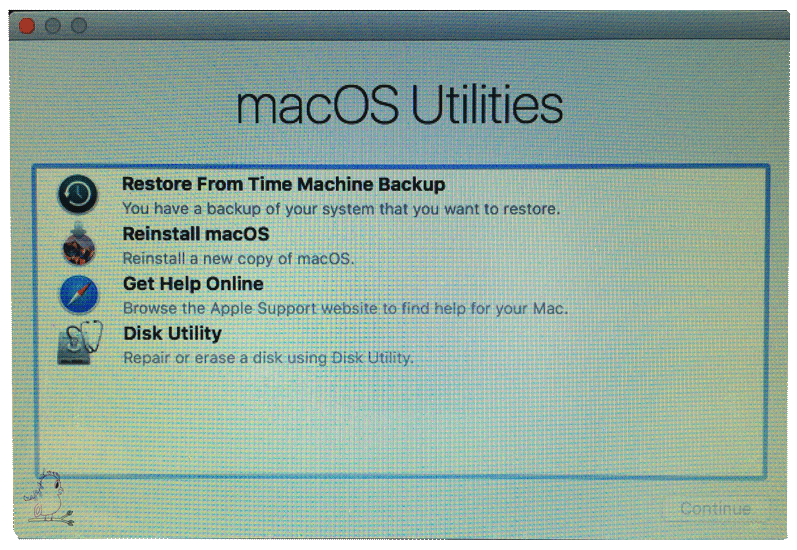
Once at the macOS Utilities screen, you will highlight Disk Utility and click continue at the bottom.
Step #4:
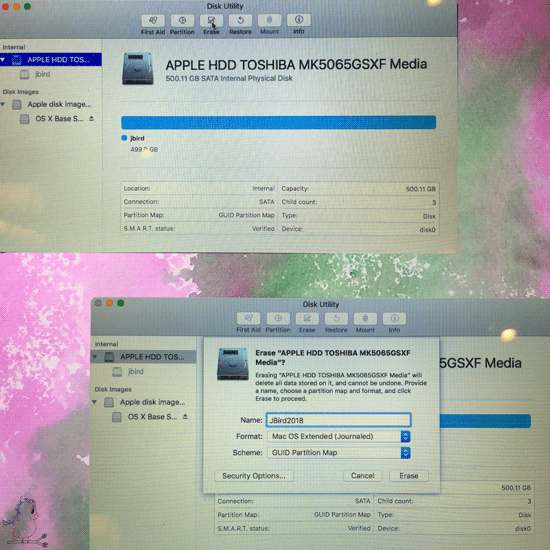
Here on this screen, you will either see what I saw on mine, Apple HDD; or you will see to select Macintosh HD. Once selected, you will then click on Erase there at the top towards the middle of where it says Disk Utility. Another screen will pop-up making sure you want to erase the selected and to name the new.
As you can see, I named mine JBird2018 so I would remember when I did a total wipeout last. Make sure in the Format drop-down Mac OS Extended (Journaled) is selected, and for the Scheme, drop-down GUID Partition Map is selected.
Step #5:
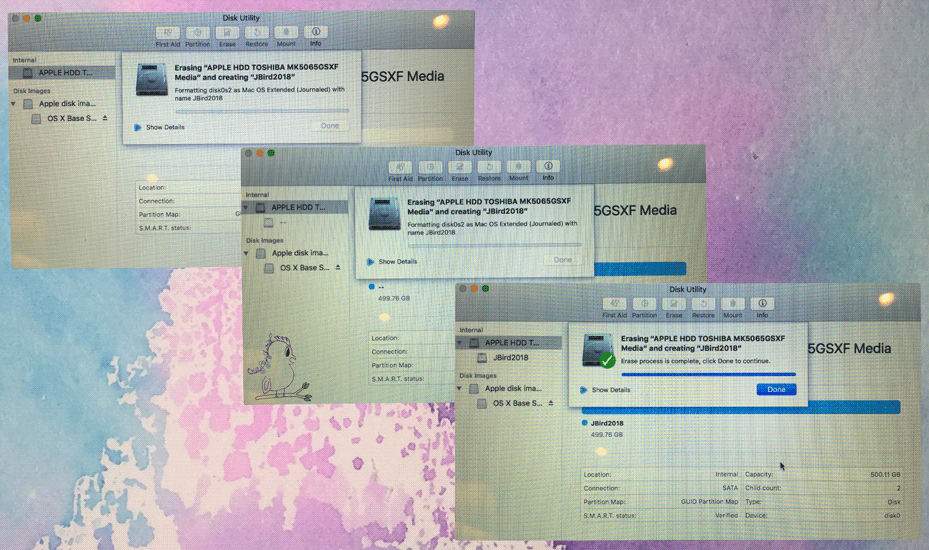
After making sure everything is correct accordingly, click Erase, and you will see the computer do its work. For me, this only took about a minute.
Step #6:
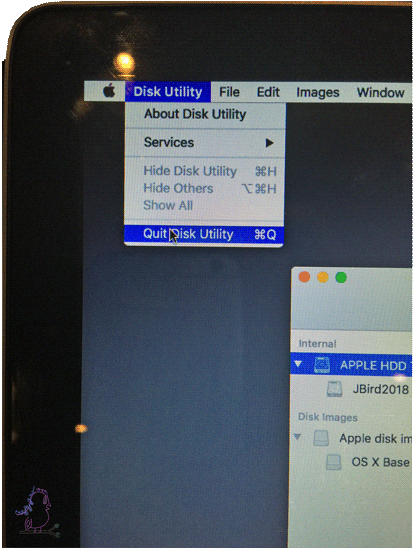
Once the computer is finished doing its thing by erasing the old and creating a new HD, you will then select the top menu for the Disk Utility to Quit to exit.
Step #7:
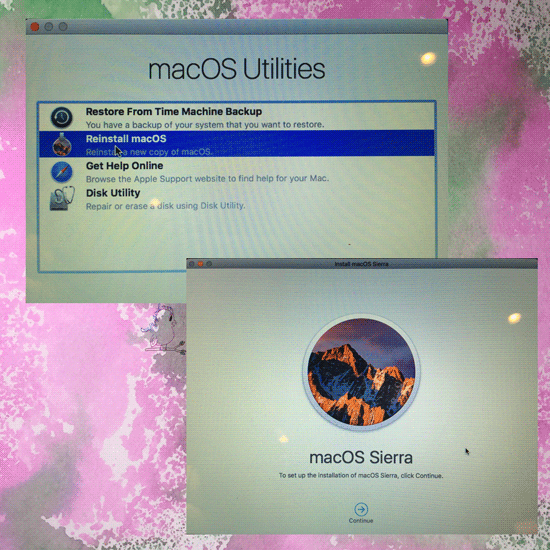
After exiting out of Disk Utility, you will have the macOS Utilities menu pop back up. Here, you will now highlight to Reinstall macOS, and select Continue at the bottom of which this next step will come up for installing the latest macOS. In my case, it was macOS Sierra.

Step #8:
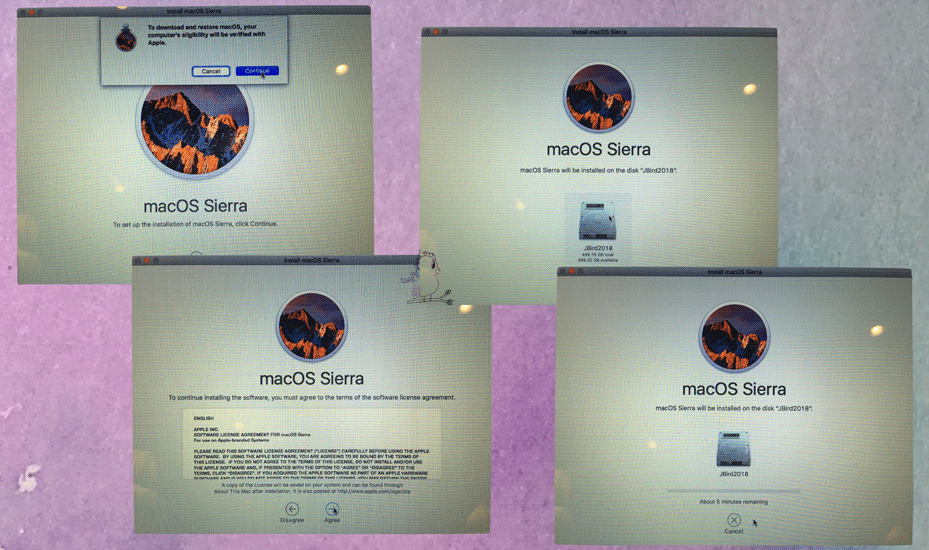
You will then click Continue, where Apple’s software agreement will pop up, and you will click Agree. Once you read and Agree, the next screen will come up to confirm installation where you will click Install.
Step #9:
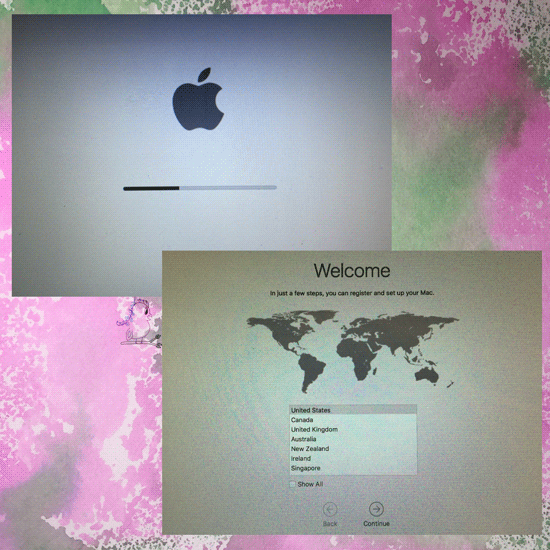
The process of installing the macOS again took about 40 minutes. While I waited, I walked on the treadmill. Once the installation is complete, you will go through the same steps of setting up your Mac as you did when you first purchased it. The first screen is for which country you live in, which of course, I’m in the States, so I selected the United States.
Step #10:
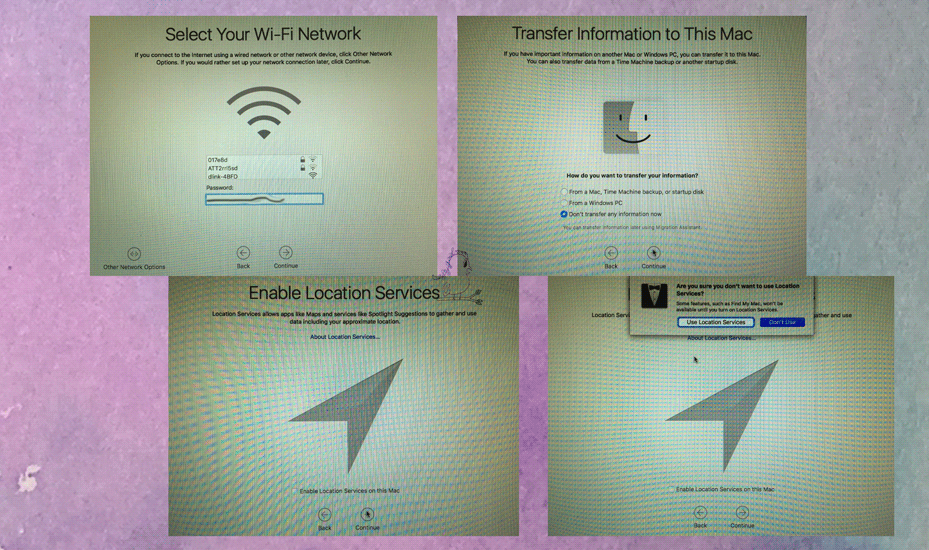
Next, you will select and connect to your Wi-Fi to finish setting up the computer. Here, you also will be asked to Enable Location Services. You can opt out but doing so will not enable the Find my Computer option.
Step #11:
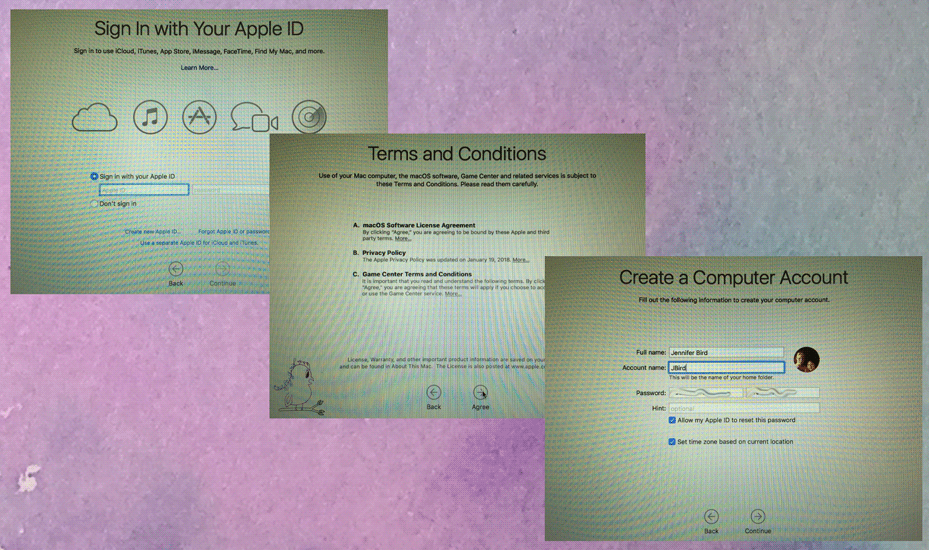
After enabling the location services, you will be asked to enter your Apple ID. Apple has changed the settings for this over the years so it could be such as craftyjbird@MAC.com, craftyjbird@ICLOUD.com or just CRAFTYJBIRD without @___.com.
Once you’ve signed with your Apple ID or if you chose, created a new one; you will be asked to Agree to the Terms and Conditions. After agreeing you will then Create a Computer Account. Personally, I like to have where I have to log in to my computer each time I go to use it. This ensures, for example; if I decide not to take it with me one day while staying in a hotel, the maid or something cannot access my computer while I am gone.
Step #12:
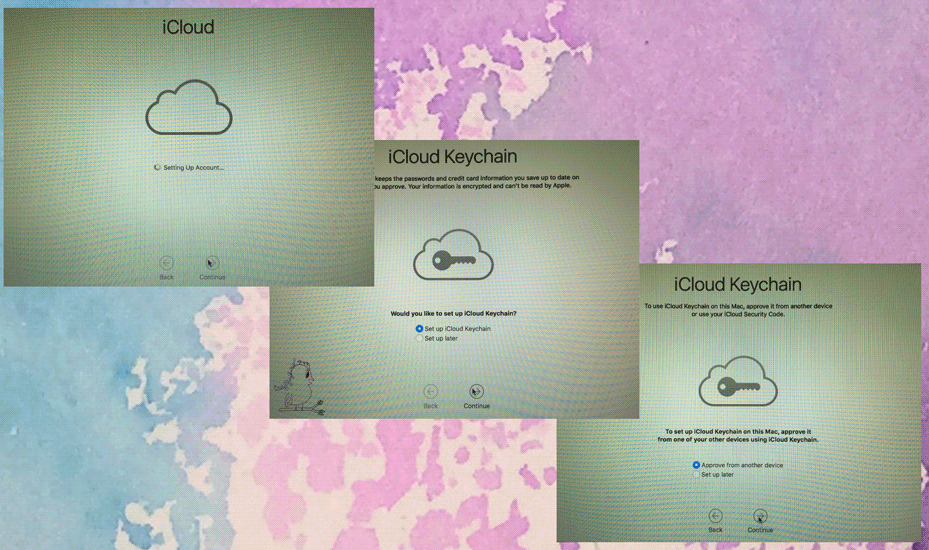
Then, you will see the screen where the iCloud is getting set up on your computer. Once iCloud is finished, you have the option of either setting up iCloud Keychain – AKA logins and passwords or waiting until later if you chose to set it up at all. If you decide to go ahead and set it up you will then be asked if you would like to have it approved by using another device also using your Keychain.
Step #13:
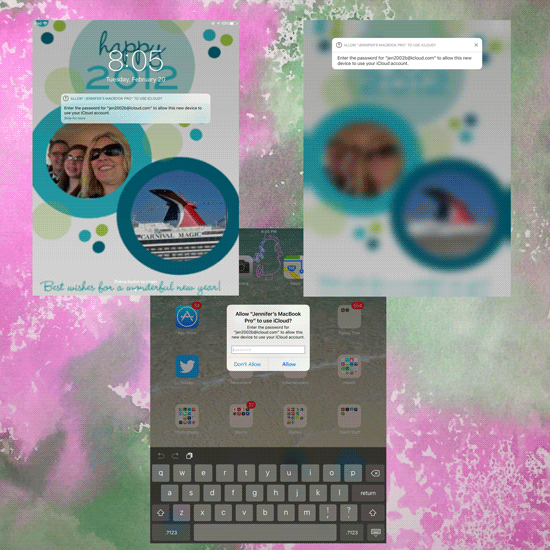
As you can see, I decided to use my iPad to set up my iCloud Keychain. Here, my iPad popped up with the message asking me to enter my iCloud password.
Step #14:
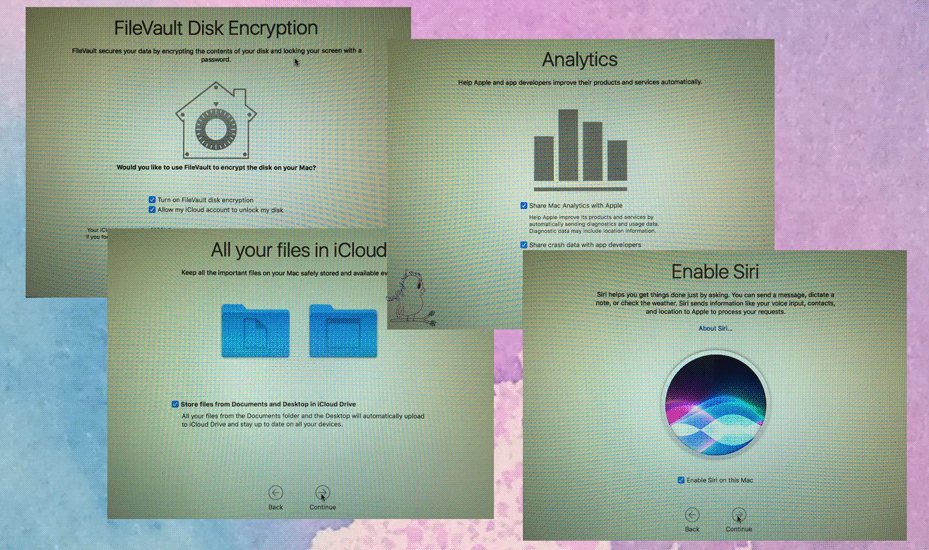
With your iCloud account is finished setting up will have the next four screens come up. It will ask about the FileVault Disk Encryption, Keeping your documents in iCloud, sending reports to Apple for Analyzing if something decides to crash, and finally; it will ask if you want to Enable Siri. Though I don’t particularly use Siri, I went ahead just in case one day I actually do use her.
Step #15:
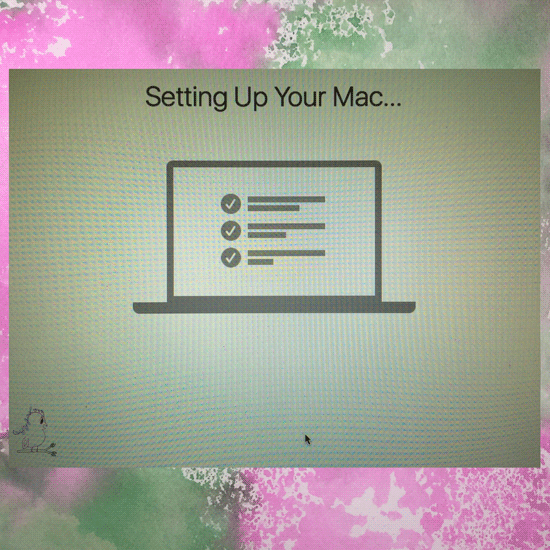
Finally, wait for the computer to finish setting up your mac, and you will be good to go.
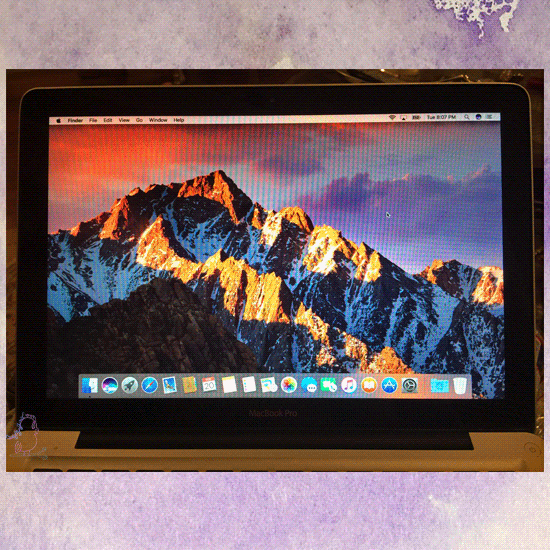
There you go, how “Making MacBook Pro Like New Again” can save you lots of money. Hope you enjoyed! This whole process of erasing to reinstalling and setting up took exactly an hour for me to get finished. As for backing up the computer beforehand on my external hard drives; that took a little longer, but this process would depend on how much you actually have to back up. I have thousands of pictures along with quite a few videos and documents.
Have any questions about today’s “Making MacBook Pro Like New Again” post? Please feel free to comment below, and I’ll respond back as soon as possible! Thanks for visiting! Hope to see you again!

Need a place to get away for the weekend?! Check out Memory Lane Inn! The retreat houses are awesome with so many things included it’s crazy!
Crafty JBird
**The advertisement found in this post as with all other posts, as affiliated links. Affiliated links mean by clicking them and making a purchase I get a commission. I used these affiliated links to help me keep my blog going as project materials still cost money.**