
Happy Random Tuesday!
Hope everyone has a fantastic day and a Happy Valentine’s Day! For the last couple of weeks, I’ve told you about little secrets on the iPhones so this week I wanted to tell you a little secret about the iPads. Some of y’all may already know, but I just found this at the end of last year, and I’m pretty good when it comes to electronics. Let’s get started with “iPad Traceability…”
Original Usage:
Originally, Apple® created this feature for the purpose of singling out a single app so more work could get done without the distraction. Another reason would be for when young ones are playing a game and not mess up anything else on the iPad. Though, I’ve never particularly used it for any of these reasons.
Crafting an Art:
Ever wanted to use something for inspiration but it’s been so long since you drew something from scratch you needed a little help? Well, last year after I got into this brush calligraphy writing and decided I wanted to try my hand at drawing too; I kept telling my sister I cannot draw worth a flip. I then decided I would look some cute pictures up and give it a try.
When I was younger, I would use the overhead projector my mom had in her classroom to teach myself how to draw. Of course, I didn’t want to go out and purchase an expensive light box when I knew I probably already had something I could easily use. Looking at my iPad, I knew I could easily pull up a picture and trace it that way. Unfortunately, every time I tried to move my pencil the iPad clicked on something and made it impossible to trace what I was trying to trace.

Guided Access:

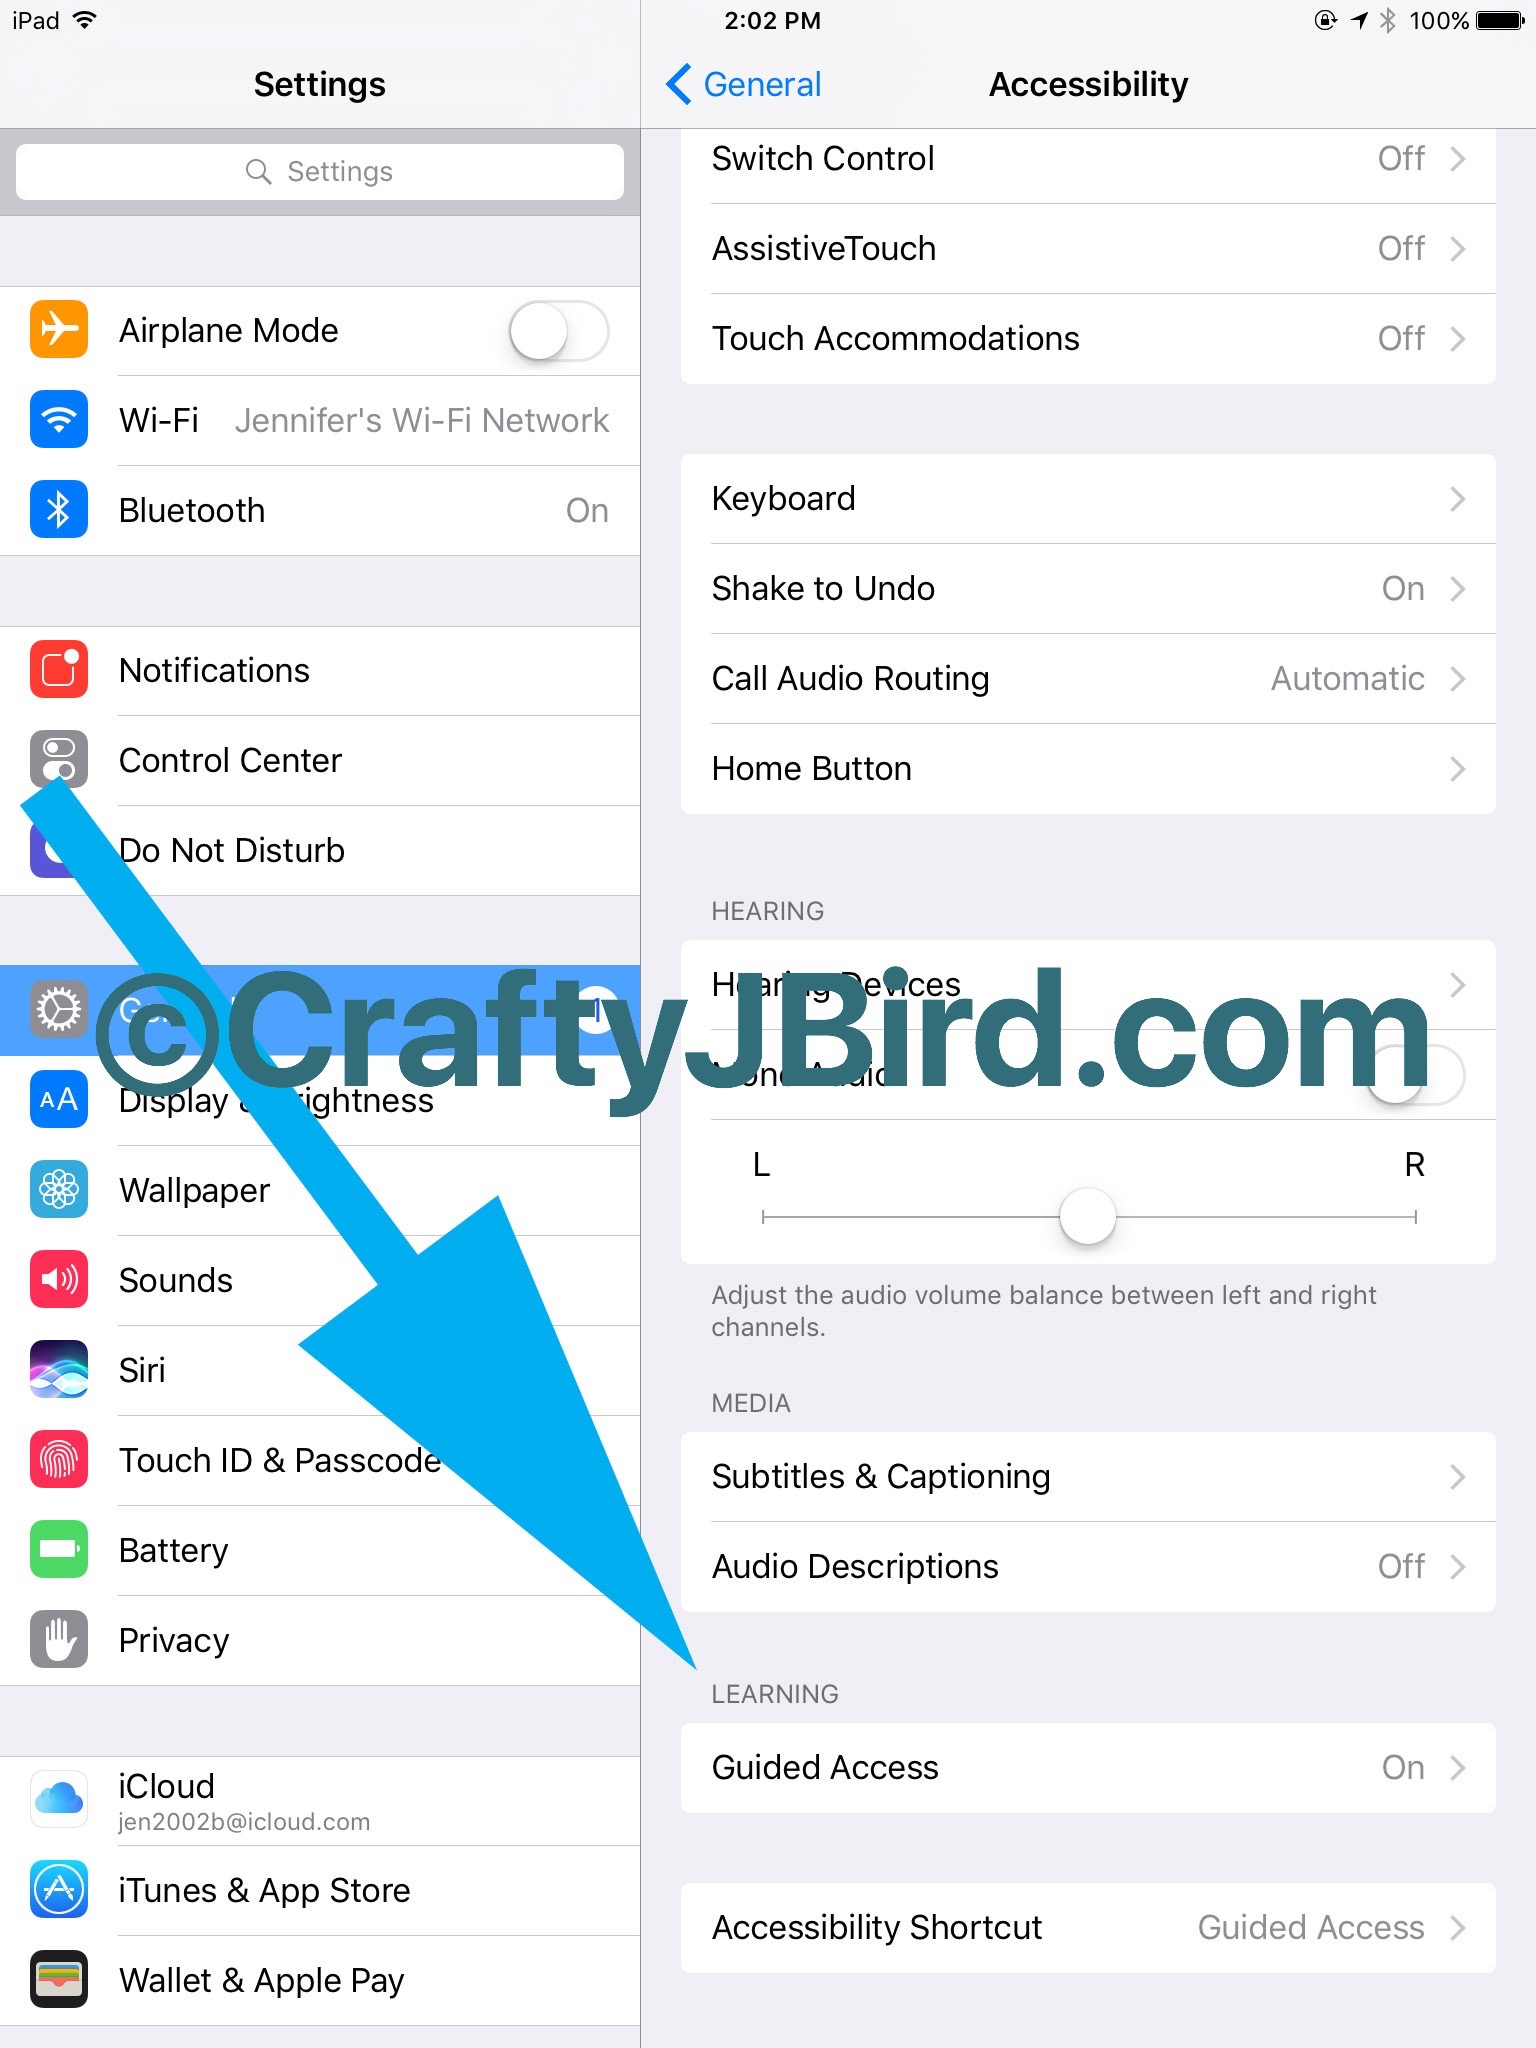
Luckily for me, after playing around on my iPad one day, I managed to come across the Guided Access function in Accessibility tab in Settings. So, to have your Guided Access to work, you would go to your Settings, click on General, click on Accessibility, and then click on Guided Access and turn it on from there. You can also set up a Passcode so once in you must have it to get out. This is useful for if you are letting a little one play a game and don’t want them to go any place else. Here’s how to make your iPad Traceable.
Step #1:

After getting it turned on per the above pictures, go into, for example, your photos and click on any picture, then triple-click your home button. Once there, you will see something similar to the above photo. I decided to use my name when I wrote it in the sand down in Long Beach, MS back in November.

Step #2:
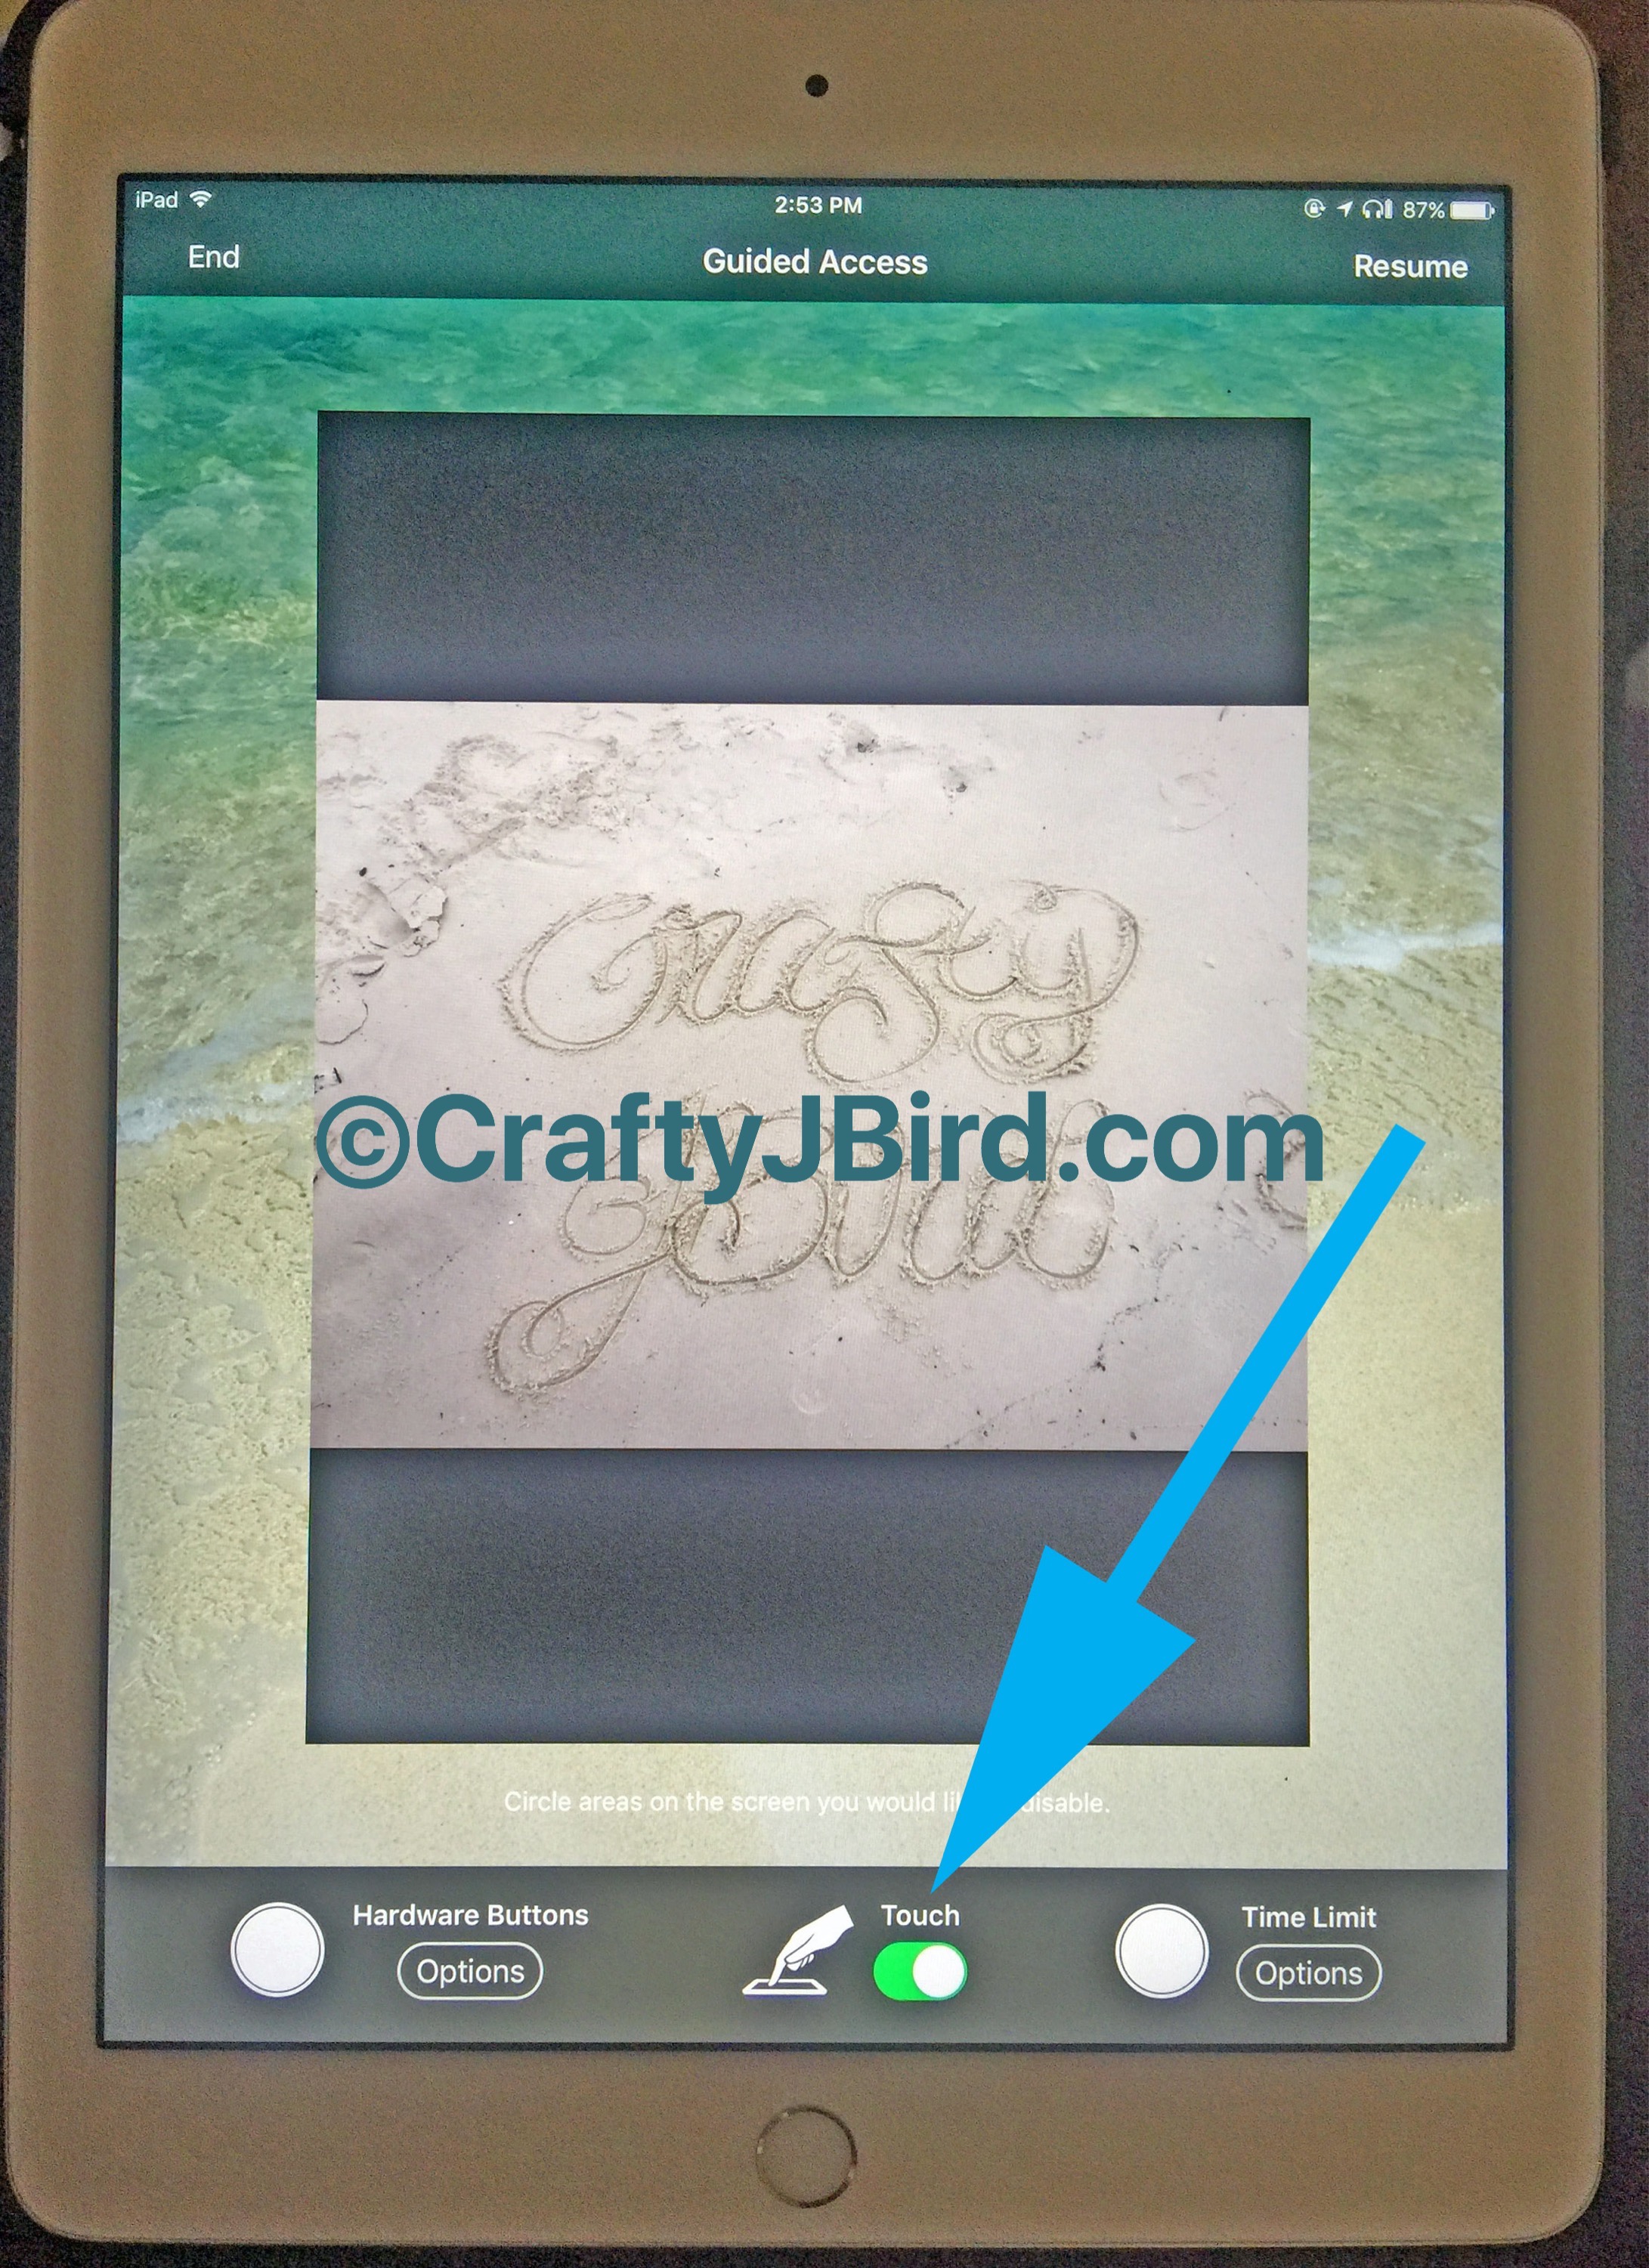
 In the first photo, you see where the “touch” is on ‘green.’ This is where you can either turn it ‘off,’ or keep it green. Keeping it green will allow such as a game to still be played while in this mode. Turning it off will not allow anything to happen on the screen until you end the guided access.
Step #3:
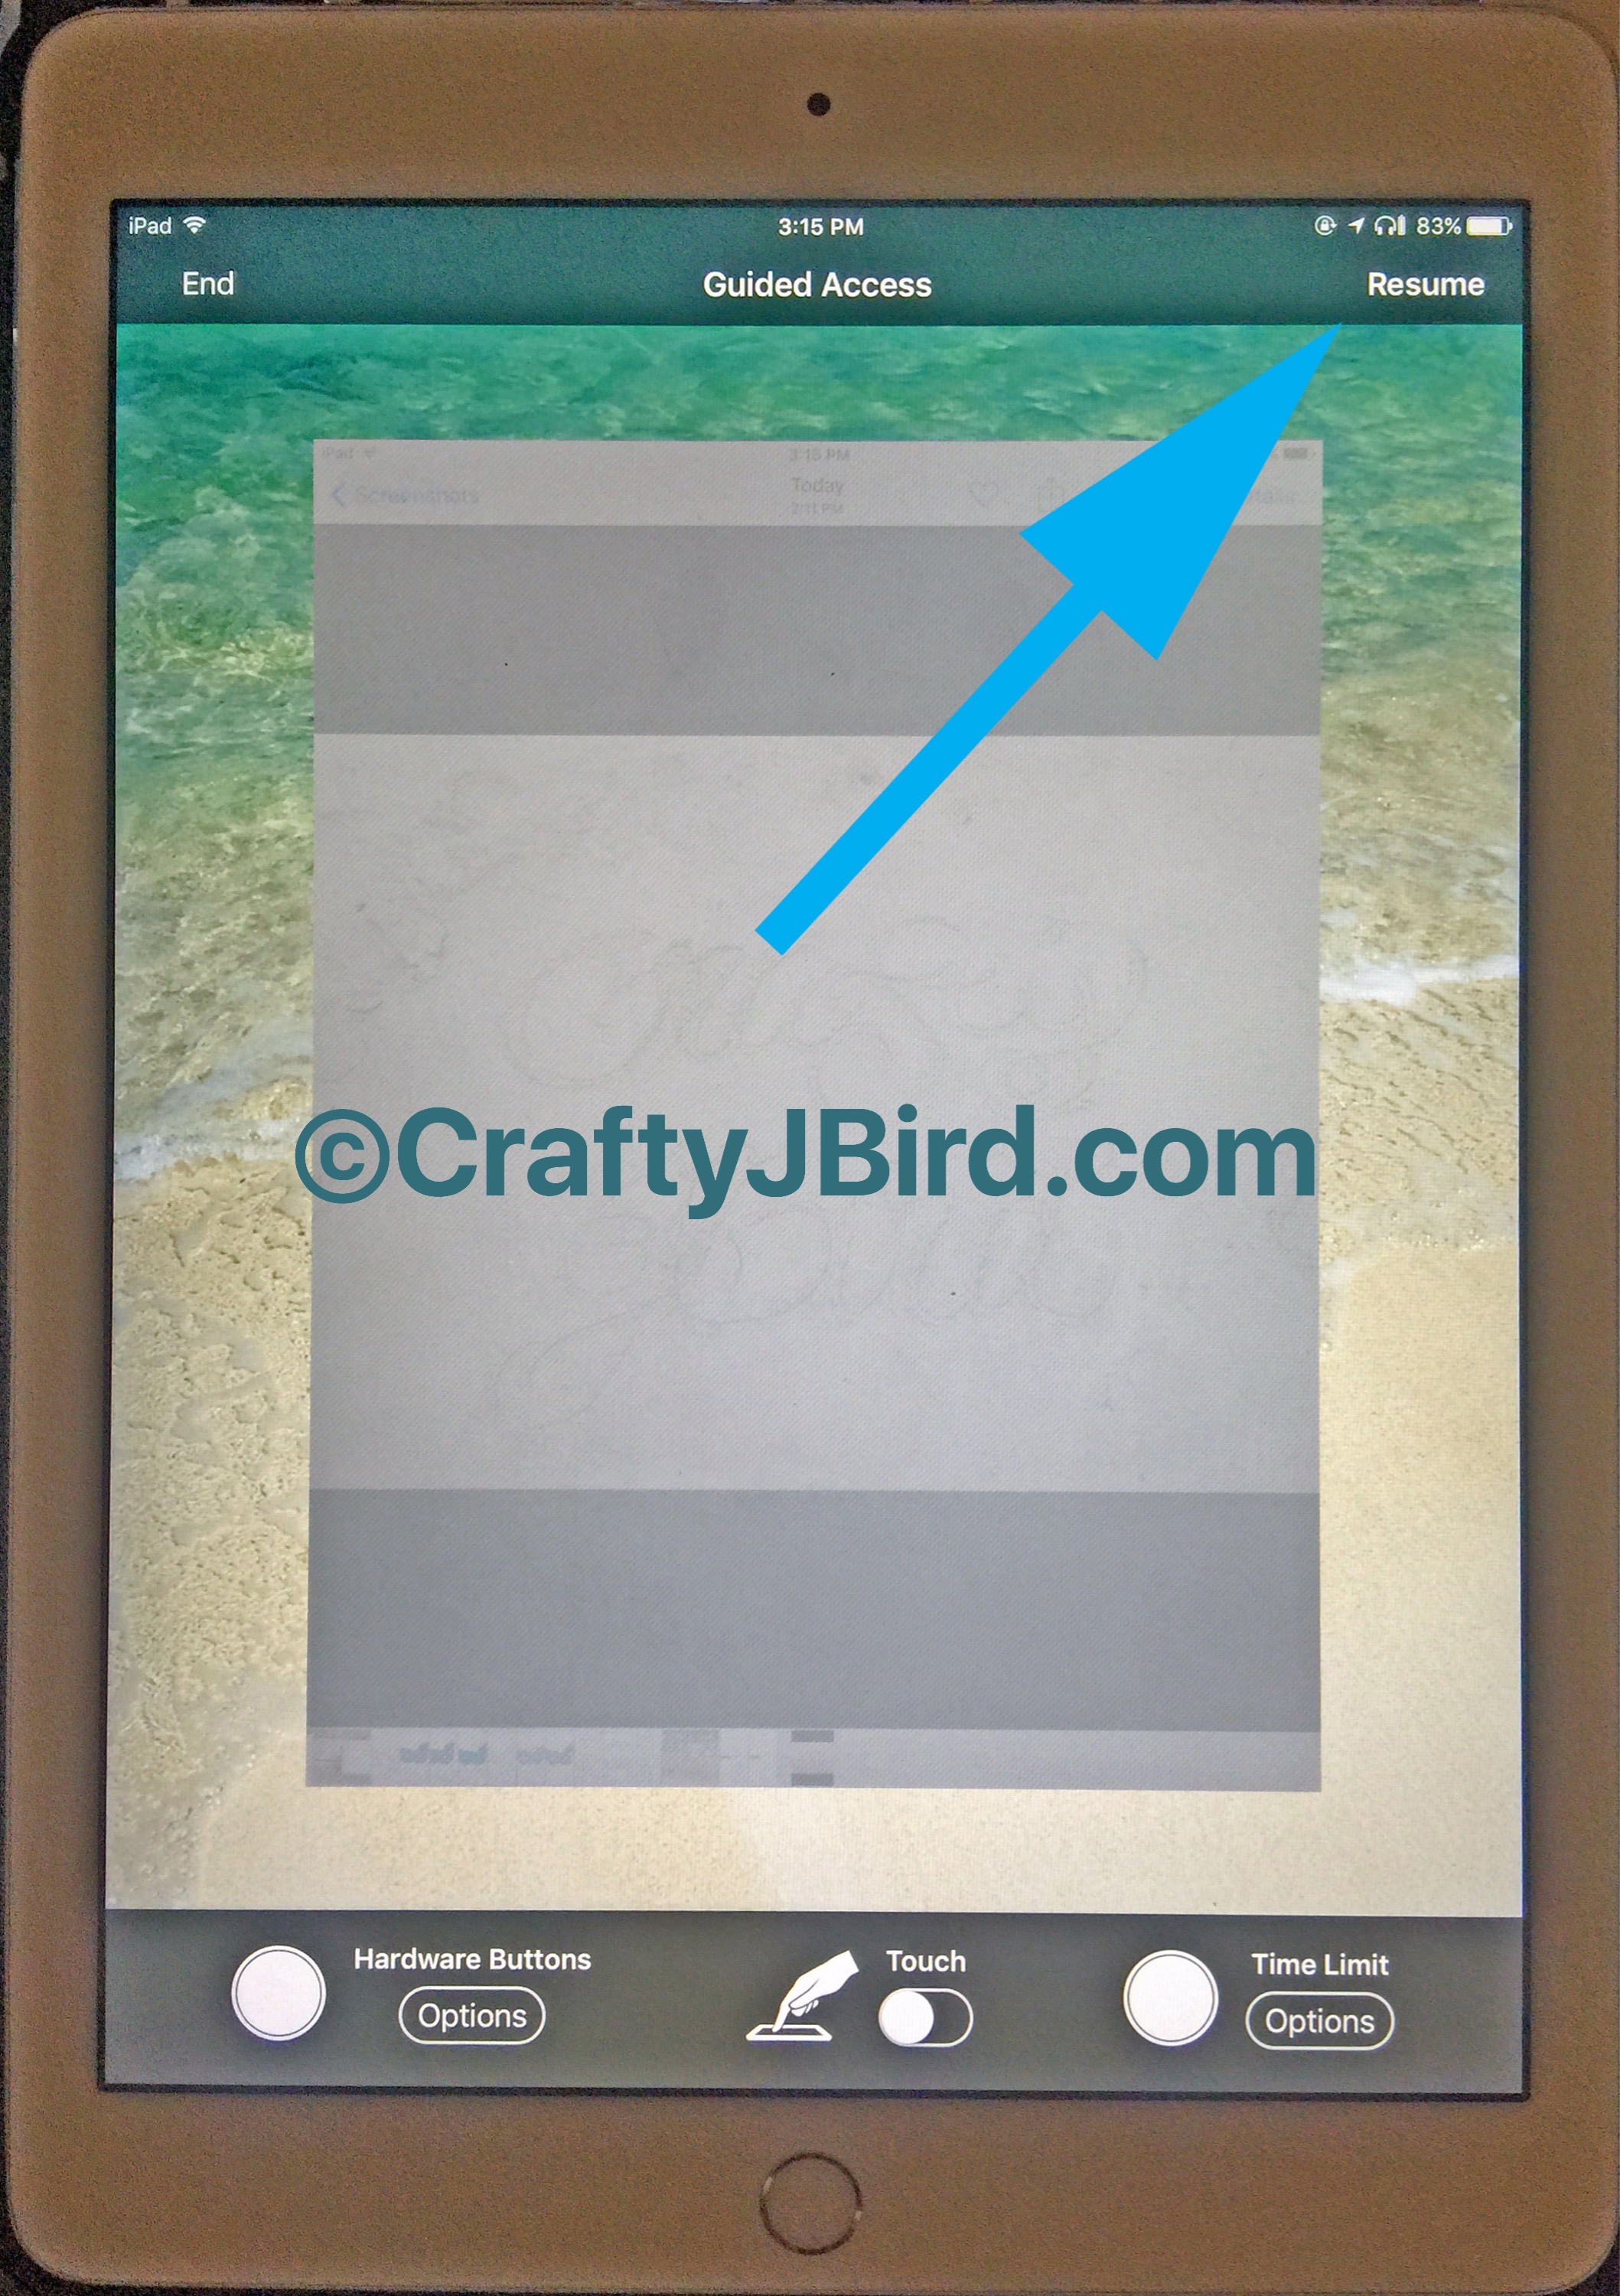 To have your iPad Traceability, you will want the ‘touch’ mode ‘off.’ No fear, this will cause a fog-like overlay on your photo, this is normal. Once in ‘off’ mode, you will want to click on the button in the upper right-hand corner. On mine, because I’ve had it set up for a while now, says “resume;” however, for those setting it up for the first time it will say “start.” Also, for those setting up the Guided Access up for the first time, if you have it on Passcode mode too it will prompt you to create the Passcode at this point.
Step #4:
Now that you are in the Guided Access mode where the screen is ‘untouchable,’ you can trace your photo. Click here for a short video. The video not only will show how your iPad can be used for tracing, it will also show the steps from start to finish in the Guided Access mode.
Step #5:
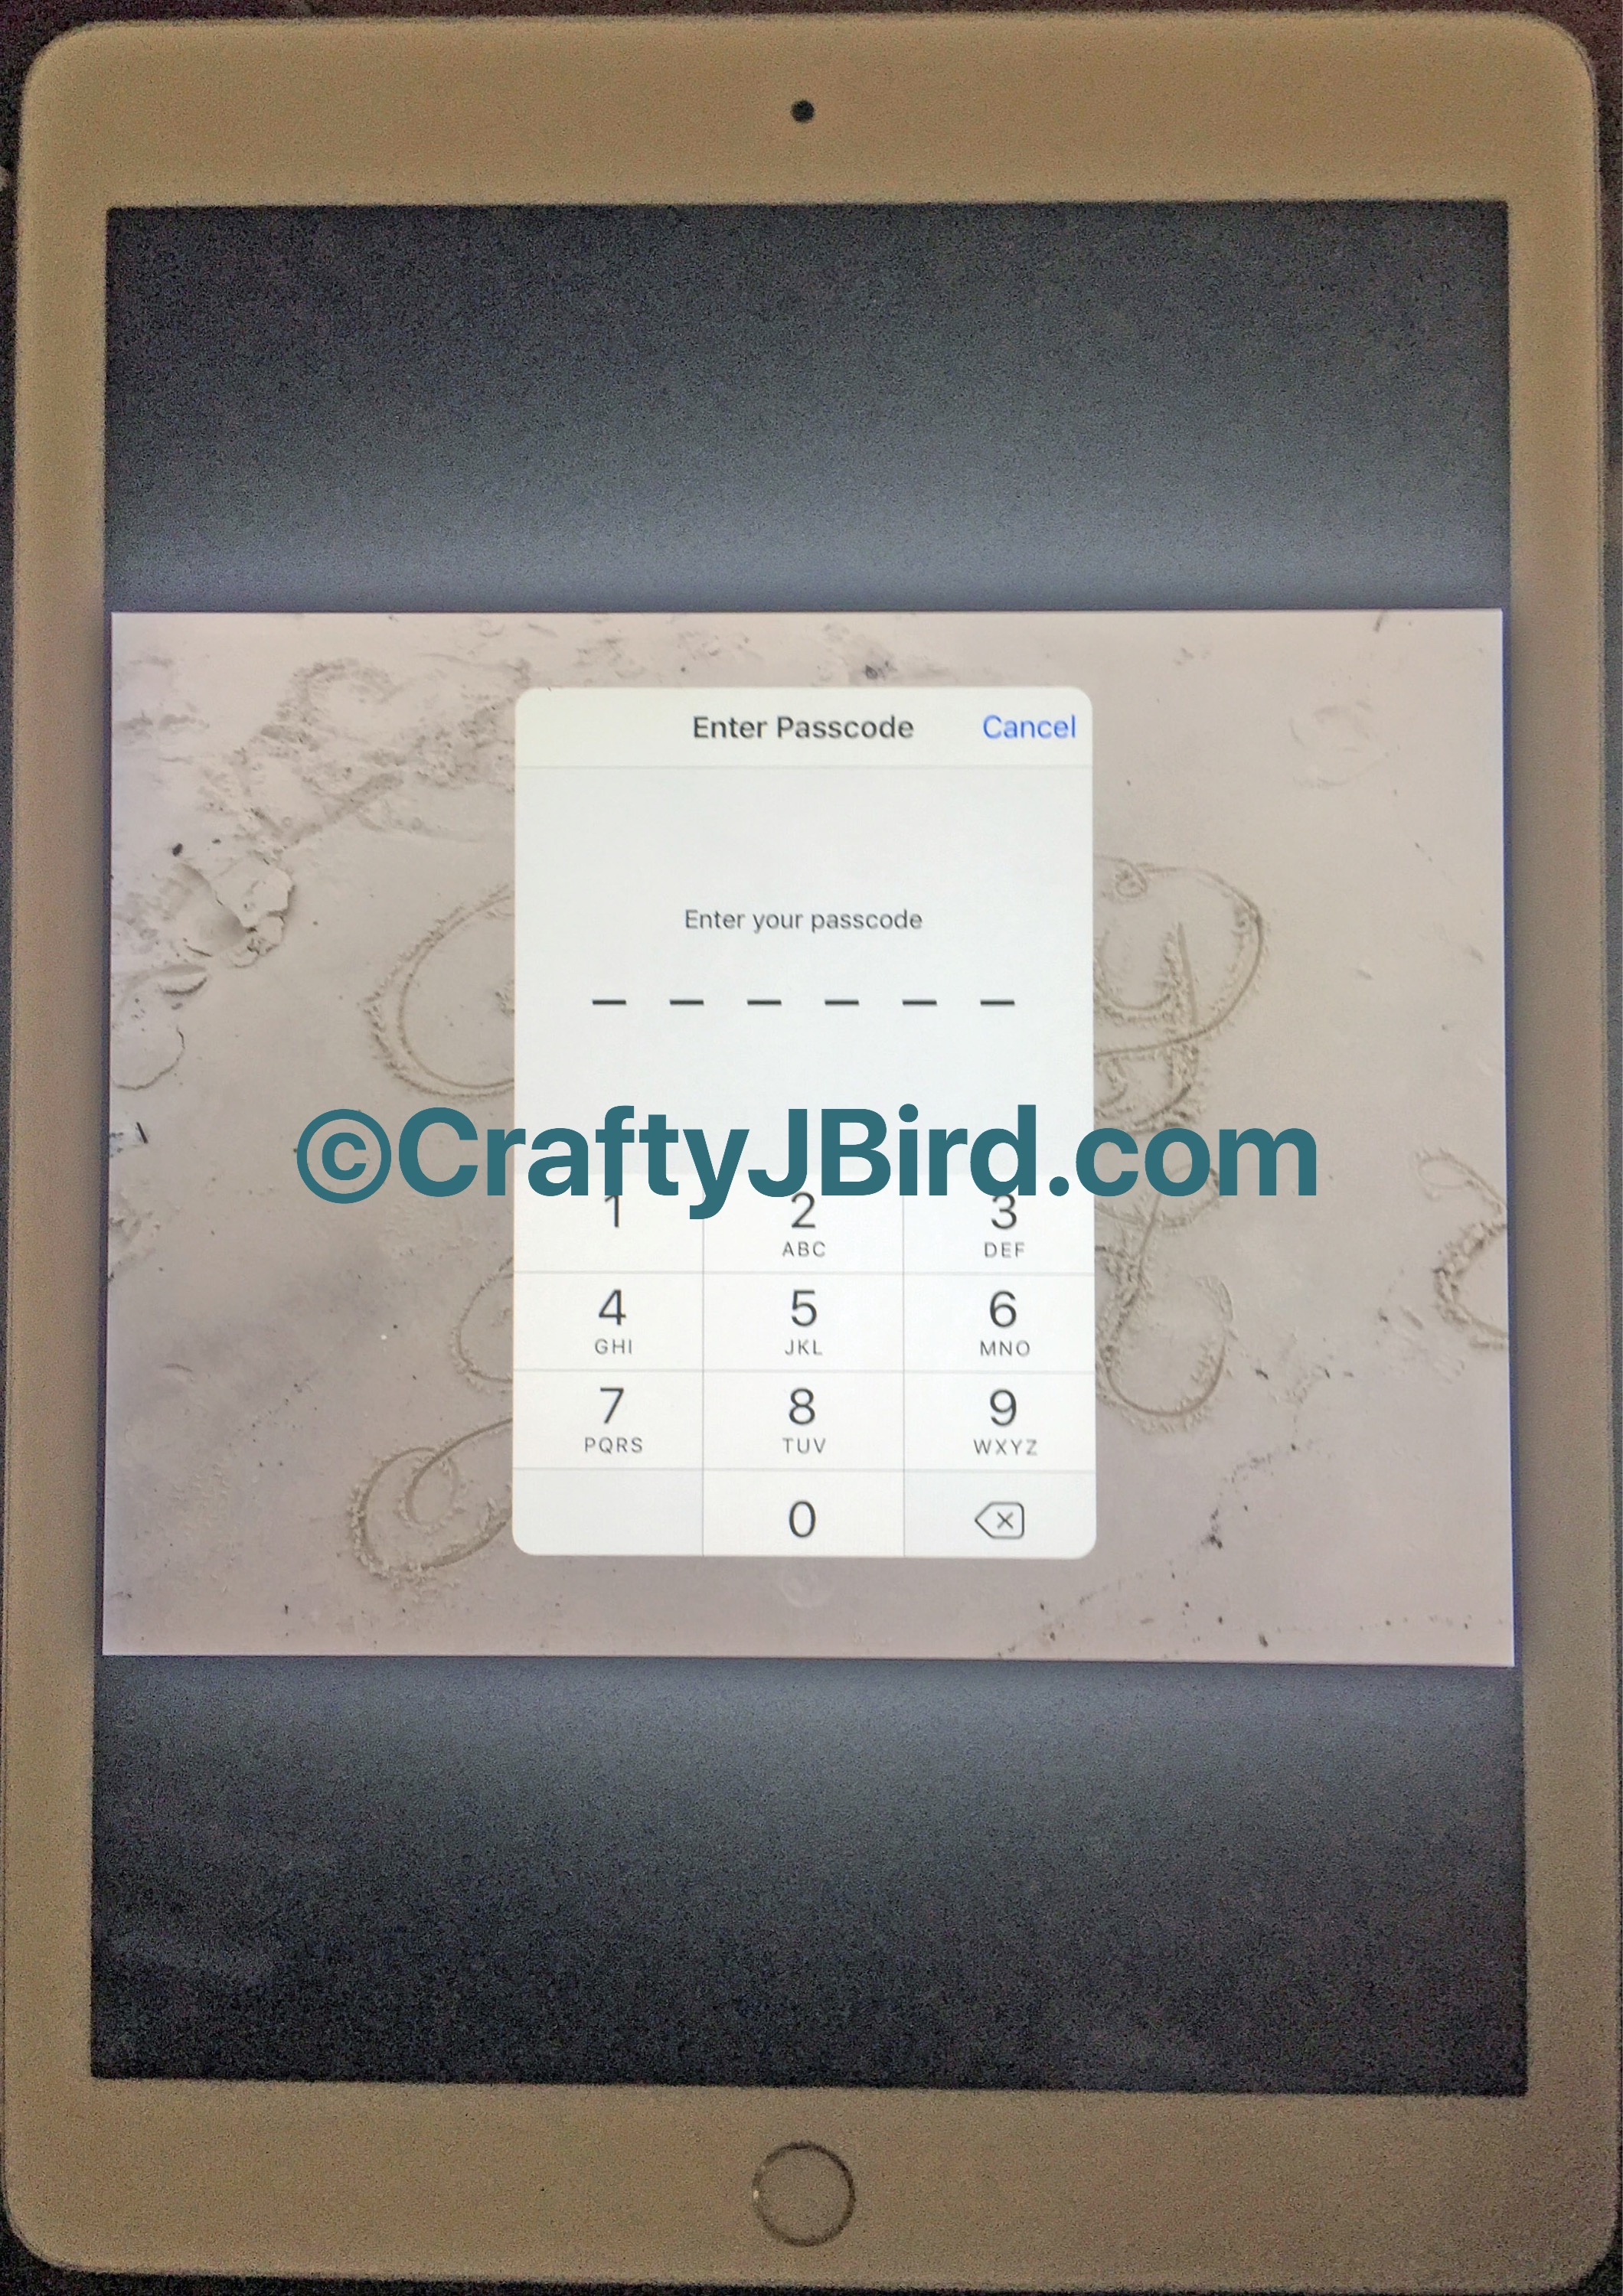
After you finish tracing your photo, in Guided Access, to exit you will triple-click your home button again. If you set up to have a Passcode, it will ask you for it at this time. After entering your Passcode, you will find yourself back to the first screen in the Guided Access mode.

Step #6:
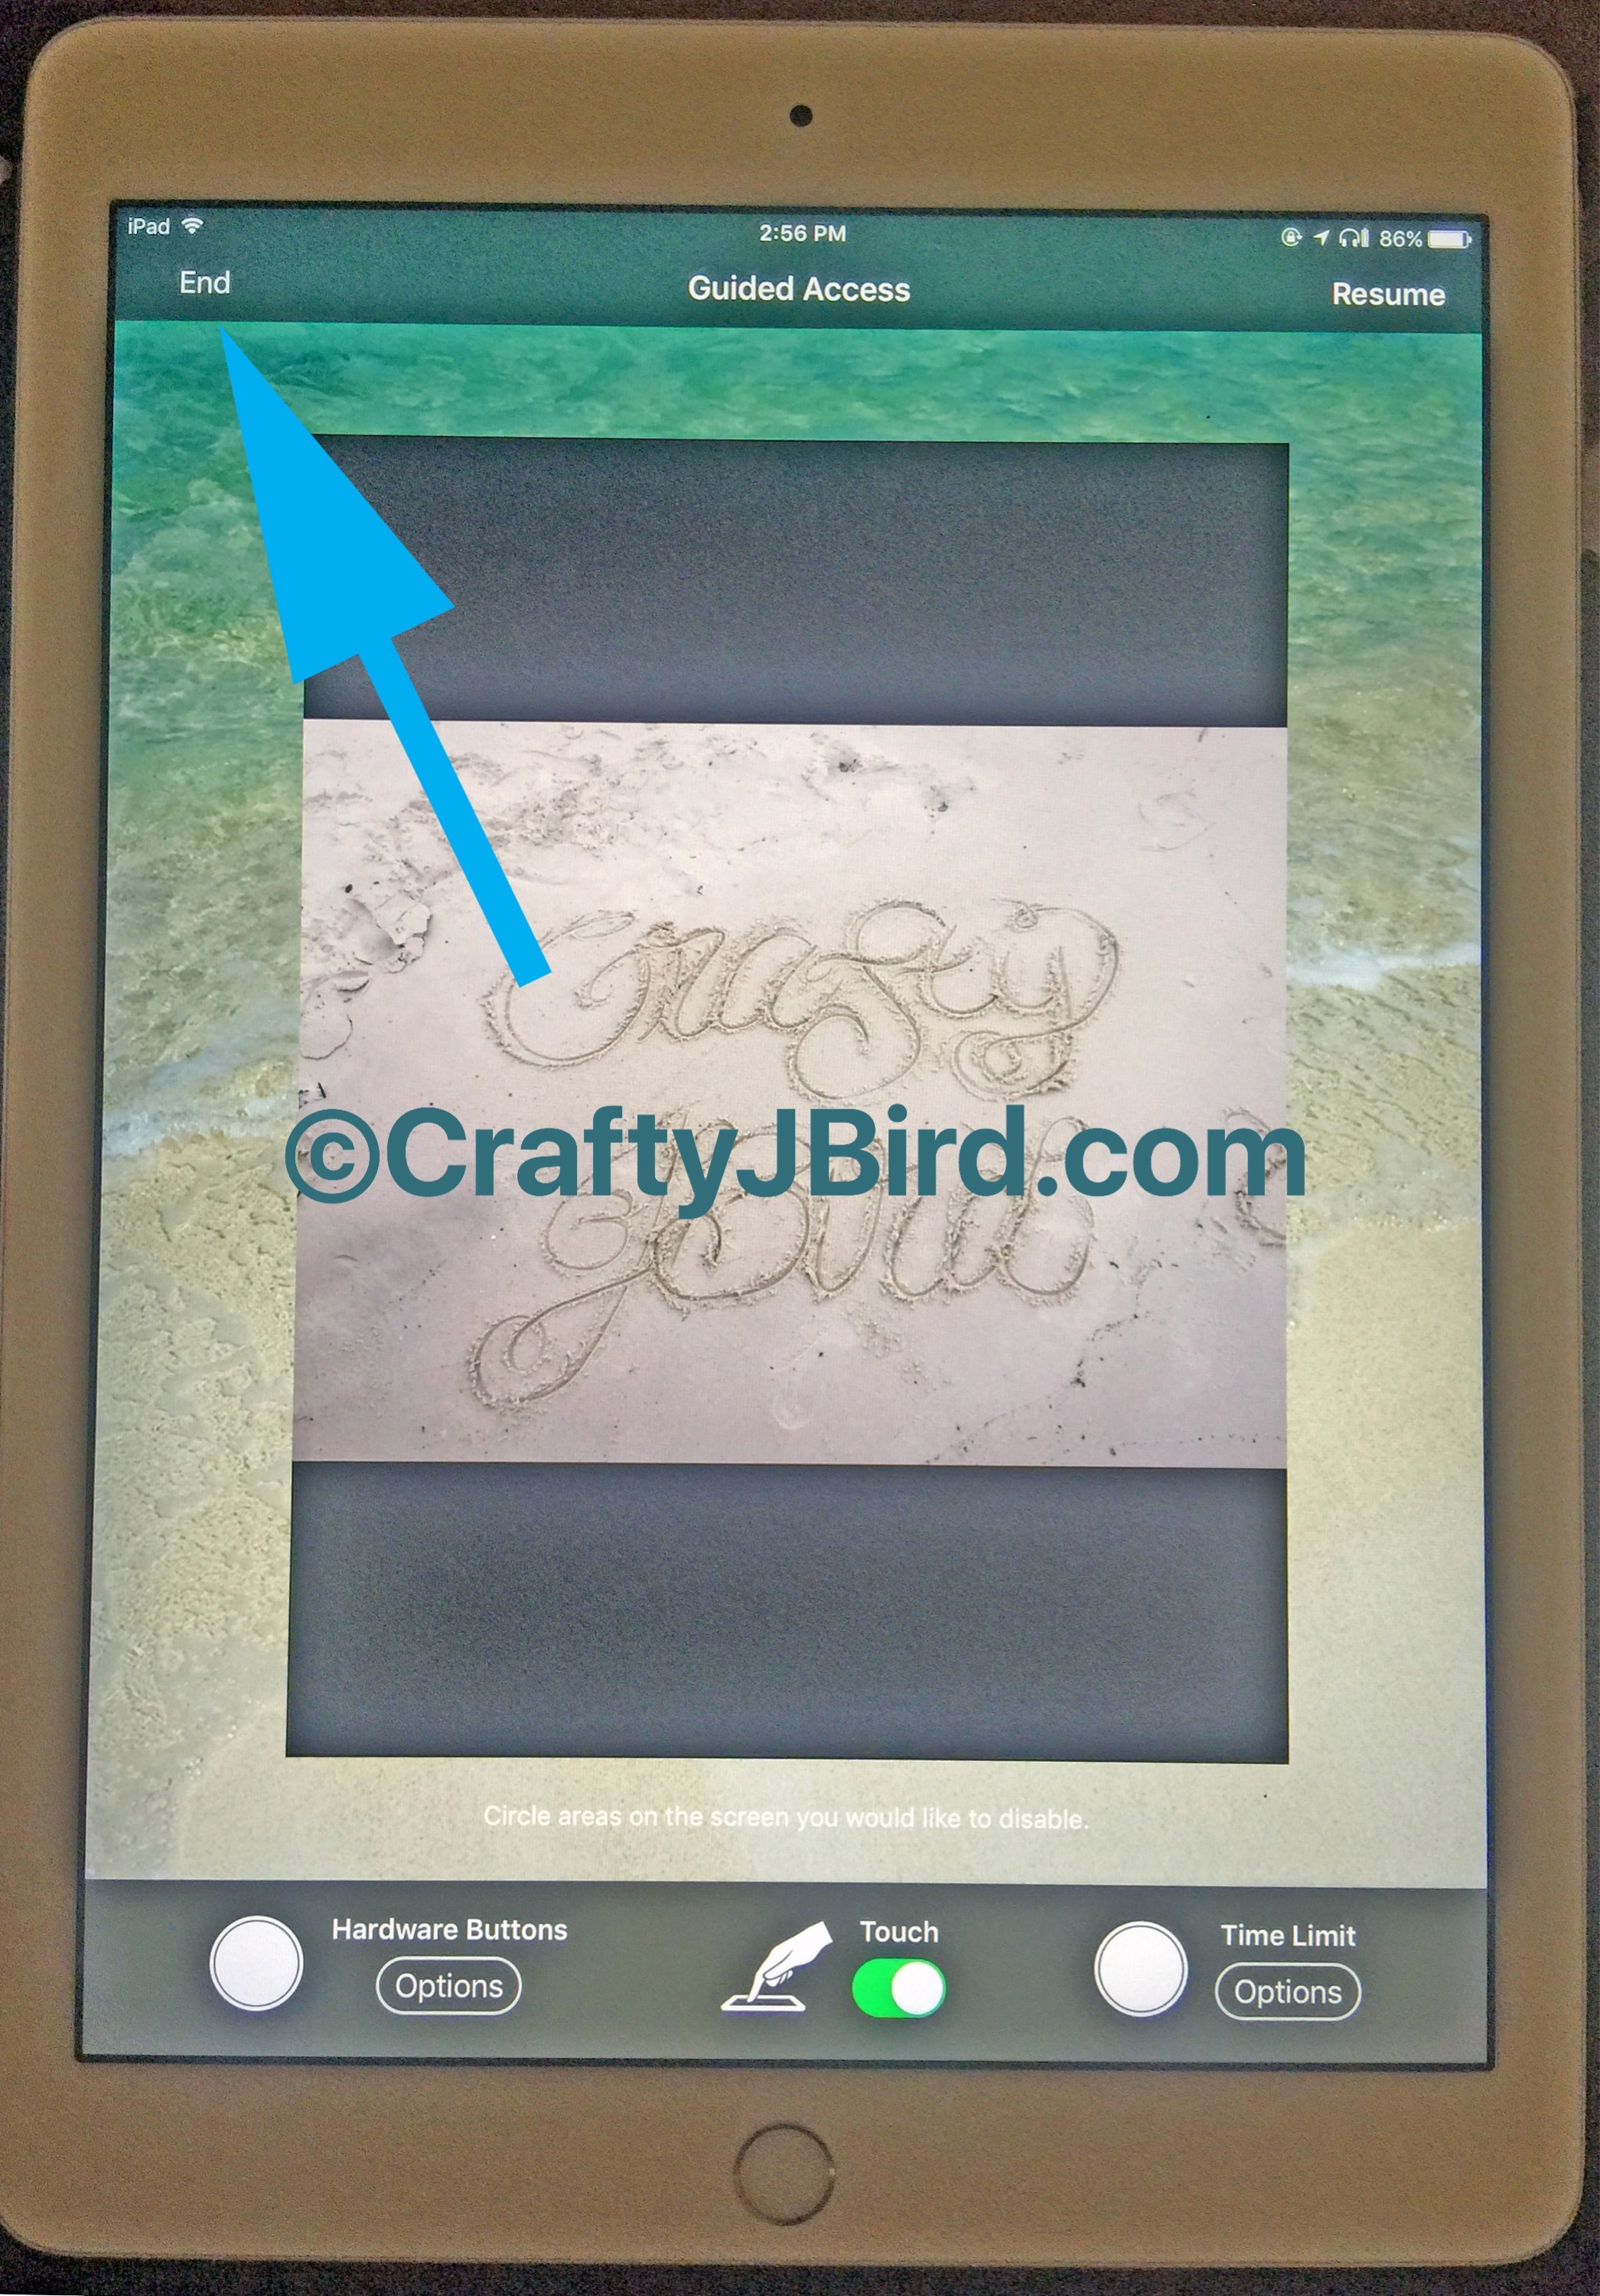

Once back on the original screen, you can completely exit the Guided Access mode by clicking the “End” button in the upper left-hand corner. To let you know you have been exited from Guided Access, a message will pop-up to let you know.
There you go, a way you make your iPad Traceability. Hope you learned something new and enjoyed!
Have any comments or questions about today’s “Random Tuesday” post? Feel free to leave it below in the comments. Hope to see you back soon! Have a great day!
Crafty JBird